Finding a brownie that is genuinely, soul-satisfyingly fudgy—not cakey, not dry—when you have dietary restrictions? That quest felt impossible for ages! Every time I baked for a celebration, I felt that little pang of worry watching loved ones with restrictions miss out. I still remember the day I baked my very first batch of gluten-free brownies. My daughter, diagnosed with celiac disease at a young age, was feeling left out during a family celebration filled with desserts she couldn’t enjoy.
Determined to whip up a treat that would bring a smile to her face, I experimented in the kitchen until I landed on the perfect recipe. The air was filled with the rich scent of dark chocolate, and when those Ultimate Fudgy Dark Chocolate Brownies came out of the oven, I couldn’t wait for her to take a bite. Her eyes lit up, and in that moment, I realized that baking can be a bridge, connecting everyone to sweet moments, regardless of dietary needs. Trust me, these are rich, they are gorgeously indulgent, and they are perfect for absolutely everyone at the table.
Why This is the Ultimate Fudgy Dark Chocolate Brownies Recipe
You might see a million brownie recipes out there, but this one holds up, trust me. We’ve nailed the ratio here so you get that perfect, dense, gooey center every single time. This isn’t just *a* recipe; it’s the one that brought immediate smiles back to my family gatherings. Even though I use regular flour here, since you can easily swap to a 1:1 blend for gluten-free needs, this method works brilliantly for everyone!
Here’s what makes this batch different:
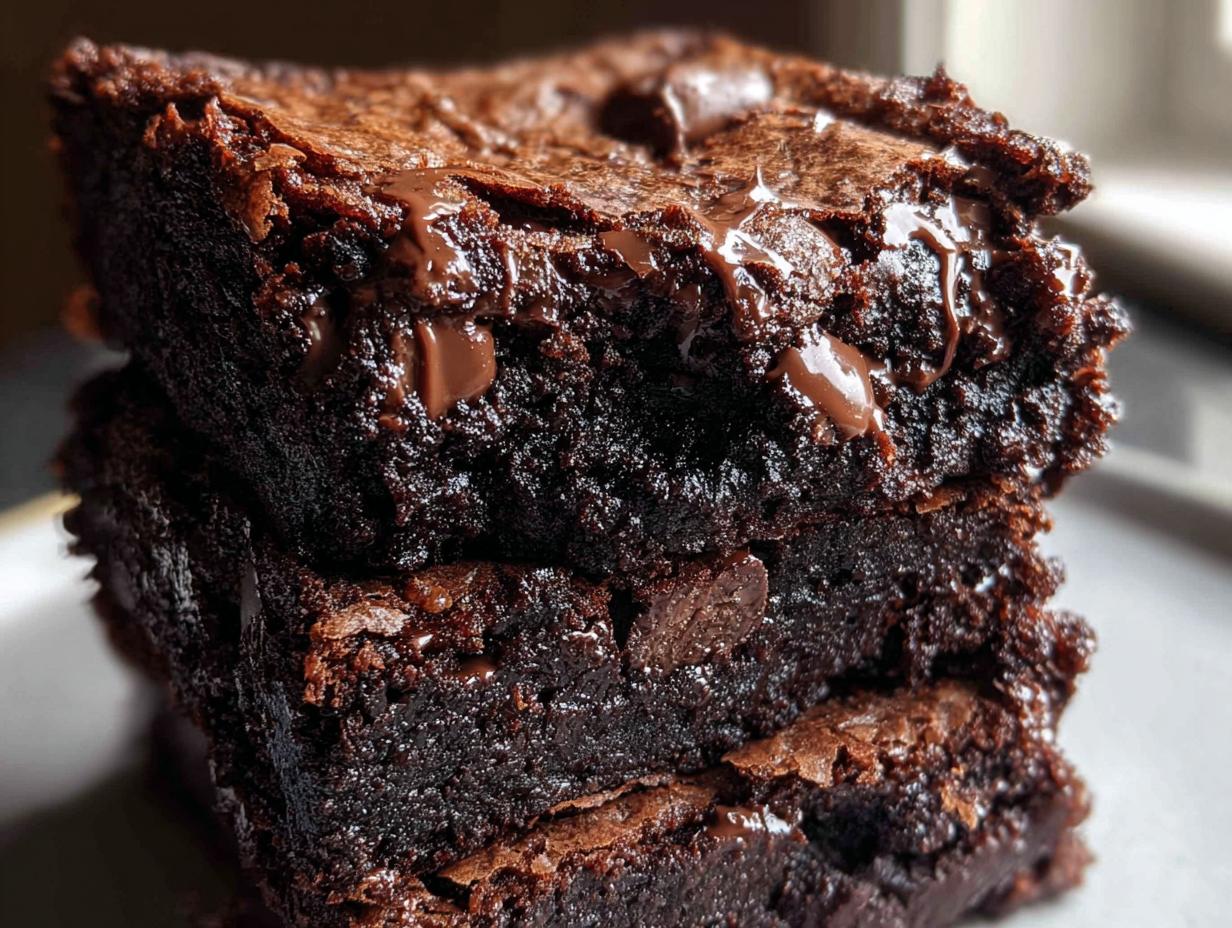
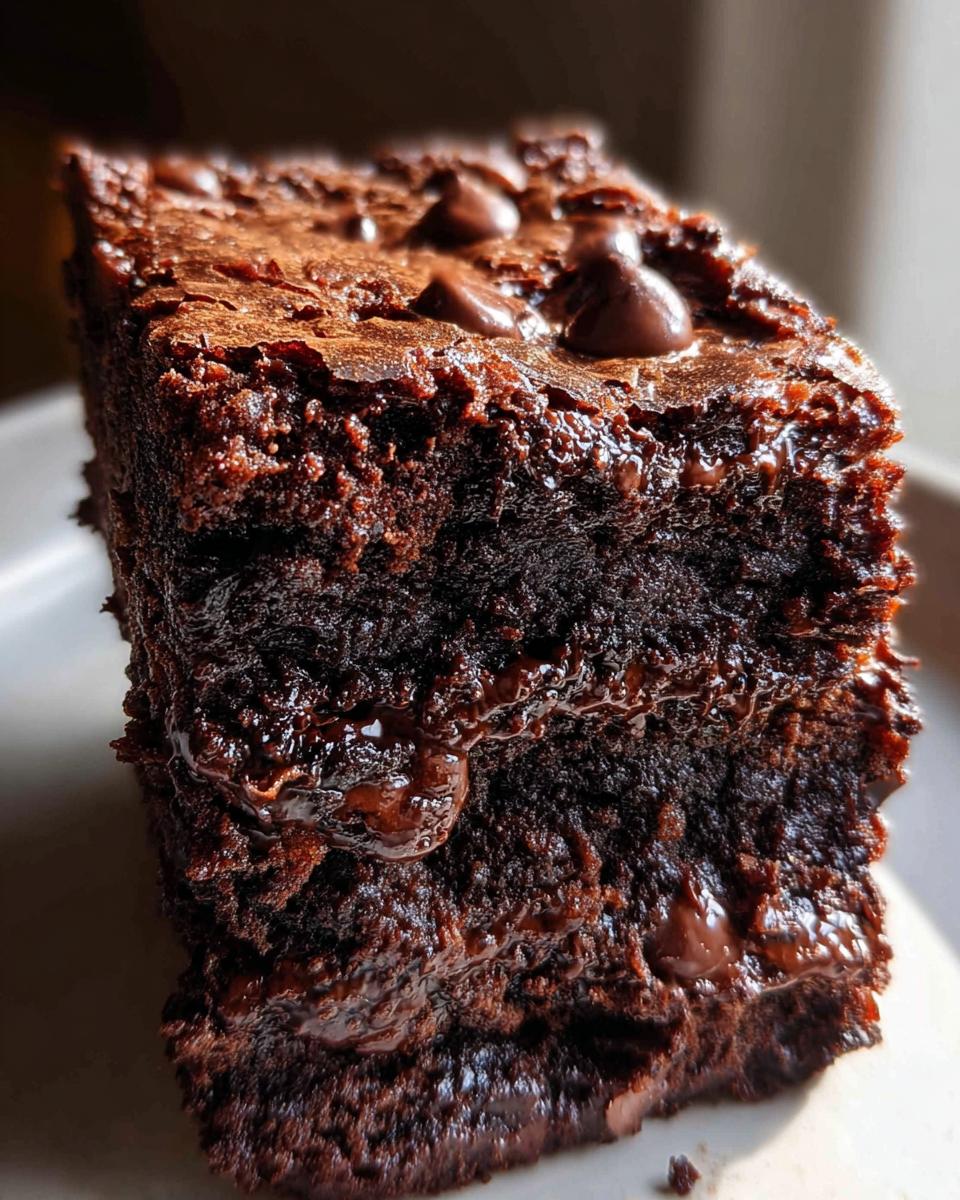
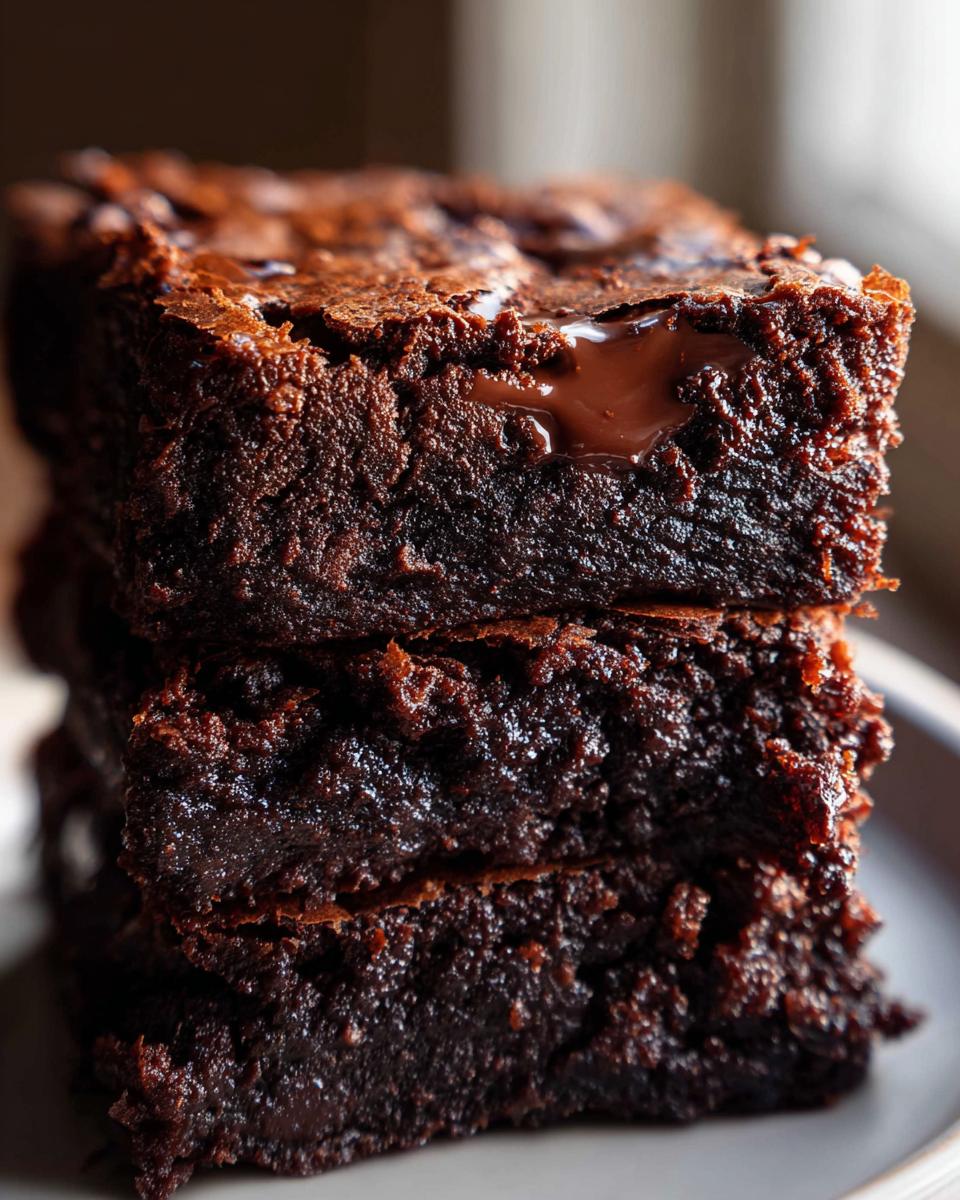
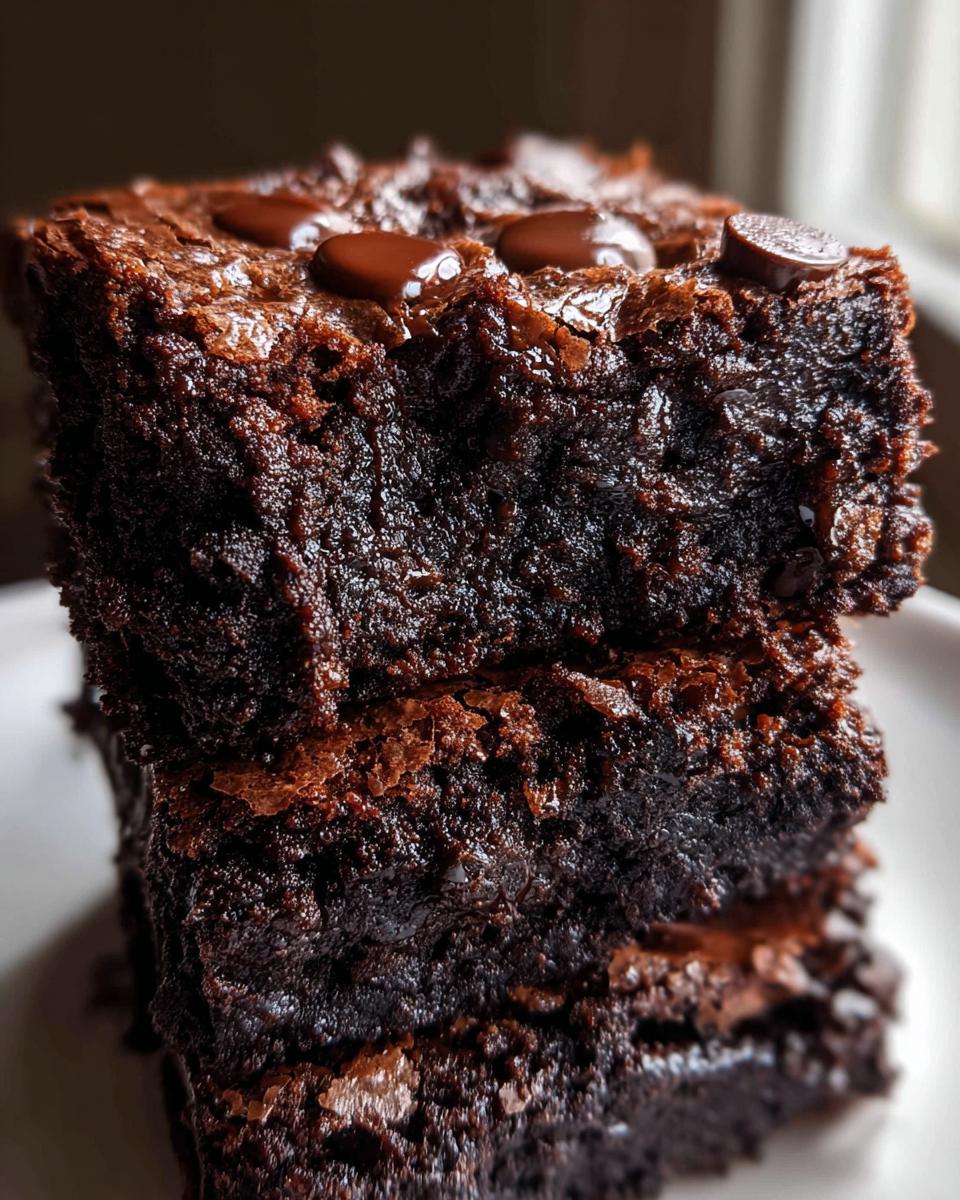
- Serious Chocolate Punch: We use melted butter *and* cocoa powder, plus chocolate chunks on top. It’s dark chocolate heaven!
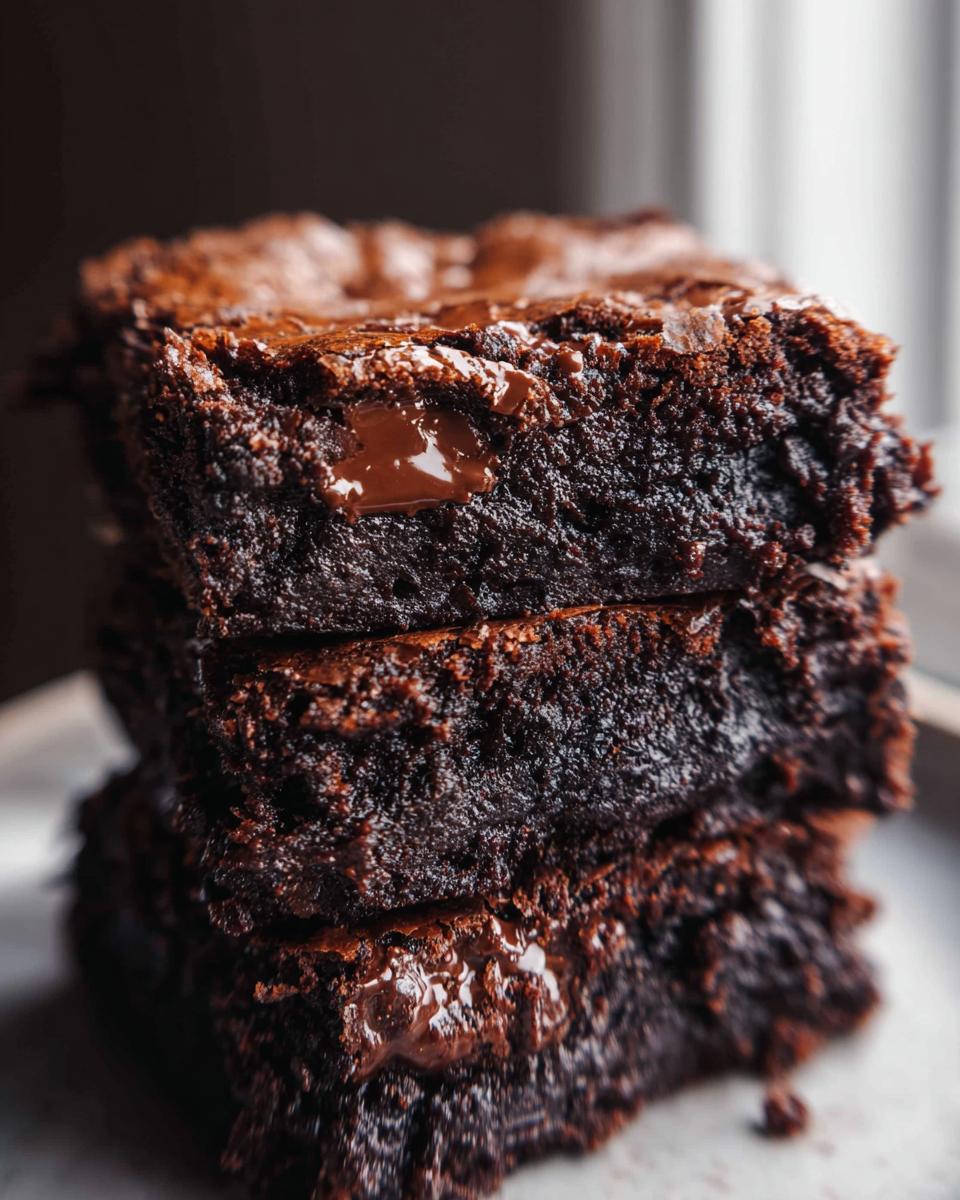
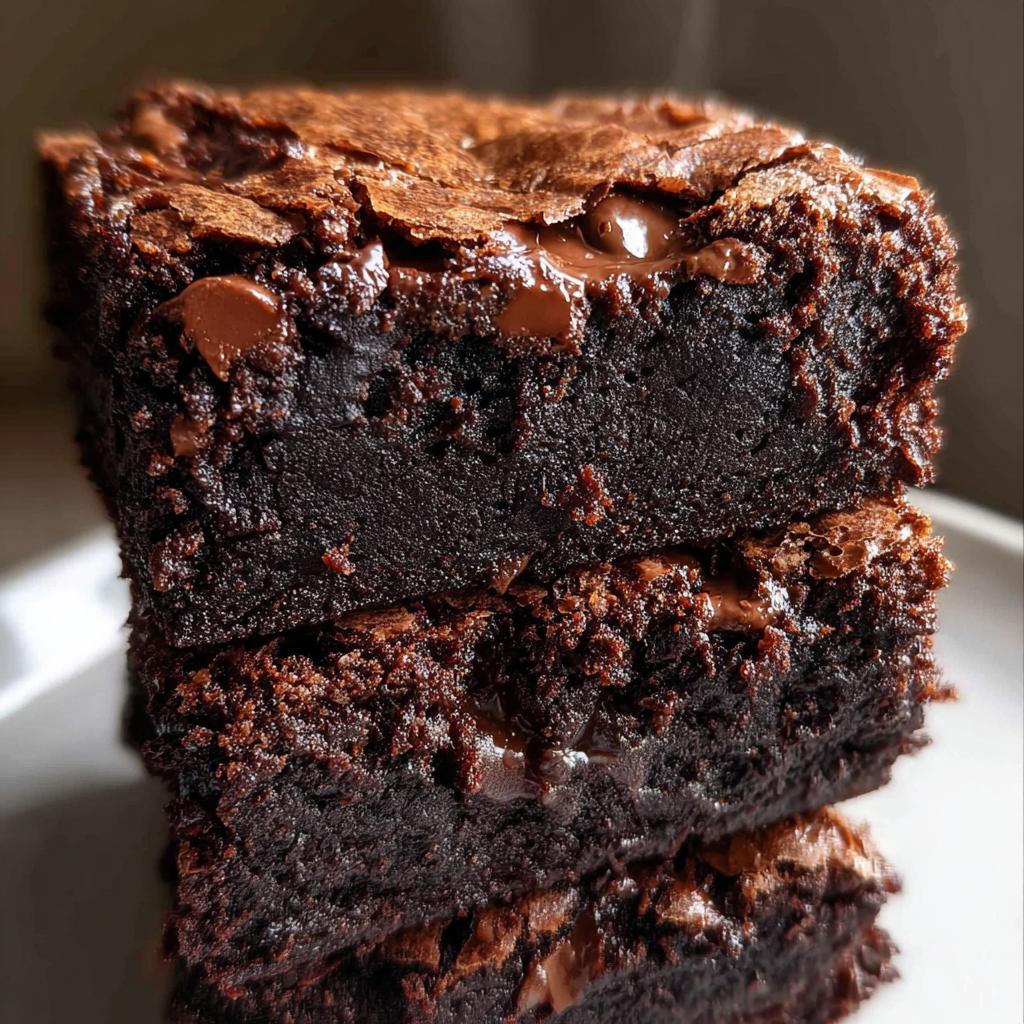
- Texture Guaranteed Fudgy: The secret is keeping the mixing minimal after the flour goes in. You want those dense, gooey layers, not a light crumbly cake.
- Easy Clean Up: Since we mix the wet ingredients right in the bowl before adding the dry stuff, this is fantastic one bowl baking. Less scrubbing later means more time enjoying those crowd pleasing treats!
If you want to dive deeper into making baking work for your lifestyle, check out some of my tips over in the GF baking corner here.
Ingredients for the Ultimate Fudgy Dark Chocolate Brownies
Okay, the ingredient list looks long, but trust me, it comes together so fast because it’s mostly dump-and-mix! This is all part of the magic that makes this a true one bowl baking success story. The key here is quality. Since these are packed with chocolate, don’t skimp on the cocoa or the chips!
For the Brownies
- 1 cup unsalted butter, melted and cooled slightly
- 2 tablespoons vegetable oil (this keeps the edges perfectly crisp, believe it or not!)
- 1.25 cups white sugar
- 1 cup light brown sugar, packed tight
- 4 large eggs, make sure they are at room temperature!
- 1 tablespoon pure vanilla extract
- 0.75 teaspoon salt
- 1 cup all purpose flour
- 1 cup unsweetened cocoa powder (use the good stuff, seriously)
- 7 oz large chocolate chips or roughly chopped chocolate (this is for mixing in AND topping!)
Step-by-Step Instructions for Ultimate Fudgy Dark Chocolate Brownies
This is where the magic happens, and honestly, it’s so fast you might think you missed a step! But I promise you, because this is designed as a truly straightforward recipe, you won’t mess it up. Just have your ingredients ready to go because once you start mixing the wet stuff, things move quickly. Remember, we are aiming for those intensely fudgy results, and our technique is designed to prevent any cake-like fluffiness!
Prepping the Pan and Oven
First things first—get that oven preheating to 175°C or 350°F. Don’t walk away; we need it hot when the batter is ready! Now for the pan. Grab your 8×12-inch baking dish. I lightly spray it all over with cooking oil spray—don’t be shy here! Then, I line it with parchment paper, leaving a little overhang on the sides. That overhang is your handle later when you need to carefully lift these beauties out to cool down. This extra step ensures zero sticking, which is essential for perfect squares.
Mixing the Ultimate Fudgy Dark Chocolate Brownies Batter
Time to mix! In your medium bowl, whisk together your melted butter, the vegetable oil, white sugar, and that light brown sugar until everything looks well blended. Now, toss in your room temperature eggs and the vanilla extract, and beat it for just about a minute until it lightens up a shade. See how creamy that is? Next, we introduce the dry team: sift in your flour, cocoa powder, and salt right over the top. This is the crucial moment: you have to gently fold everything together. Seriously, stop mixing as soon as you see no more white streaks of flour. If you over beat now, poof—you get cake! Once just combined, fold in about three-quarters of your chocolate chips or chopped chocolate.
Baking and Cooling for Perfect Fudginess
Pour that gorgeous, thick batter into your prepared pan. Spread it out evenly, and then sprinkle the rest of your chocolate pieces right on top so they melt beautifully. Pop it into that hot oven. For the fudgiest brownie experience possible, bake for 25 to 30 minutes. You’re looking for the center to stop jiggling. If you push gently on the edge, it should feel set, but the middle should still be a little soft. If you want them firmer, go closer to 35 or 40 minutes, but remember, they keep baking once they’re out!
This next part is agonizing but non-negotiable for that perfect gooey texture: you must let them cool for at least 20 minutes outside the oven before you try to pull them out using that parchment sling. They really set up during the cooling process. If you slice them hot, they’ll just collapse into a puddle, and we’ve worked too hard for that! For more general recipe tips, feel free to browse my collection of simple recipes here, or check out this great article on killer brownie techniques here.
Expert Tips for Perfect Ultimate Fudgy Dark Chocolate Brownies
Achieving that signature fudgy texture relies heavily on what you put into the bowl and what you *don’t* do once the flour is added. First, let’s talk quality. For the best dark chocolate desserts experience, use a rich, unsweetened cocoa powder. It makes a huge difference in depth of flavor when compared to cheaper varieties.
Also, please, please do not over-mix once you add the flour and cocoa! That’s the number one mistake people make. Over-mixing develops gluten, and gluten makes things springy like a cake. We want density, so fold gently until it’s just incorporated. That simple technique is what guarantees they stay gooey.
Finally, resist the urge to cut into them immediately! Cooling time is essential for structure. If you are planning ahead, wrapping the cooled squares tightly makes them even better the next day. For tons of inspirational homemade dessert ideas, pop over and look at my favorites here.
Ingredient Notes and Substitutions for Ultimate Fudgy Dark Chocolate Brownies
Okay, let’s talk swaps and tweaks, because I know many of you who follow my kitchen stories are working around different needs, especially when it comes to gluten. This recipe is naturally wonderful with regular AP flour, but I’ve tested it successfully with a quality 1:1 gluten-free flour blend. Just a small head’s up: sometimes that GF blend absorbs a tiny bit more moisture, so you might find them *very* slightly less fudgy and a bit more set—but they are still unbelievably delicious!
When it comes to the chocolate itself, you have wonderful freedom here, which is why these turn into such lovely dark chocolate desserts. I love using a mix of semi-sweet chips for melt consistency and some roughly chopped dark chocolate (around 60% or 70% cacao) for those intense flavor pockets. If you are using only bittersweet chocolate, keep in mind that might deepen the flavor quite a bit, which I personally love!
If you’re curious about whipping up other specialized baked goods, I have a few notes on handling tricky recipes like bread over on my gluten-free bread guide right here. But for these brownies, stick to the butter measurement—don’t try to substitute margarine, or you’ll lose that perfect crisp edge!
Serving Suggestions for Ultimate Fudgy Dark Chocolate Brownies
Presentation is everything, especially when you’ve just made something this rich! These brownies are inherently amazing, but turning them into showstoppers just takes a tiny bit more effort. If you’re serving these at a party or holiday gathering, they instantly become fantastic crowd pleasing treats.
My absolute favorite way is warm, right out of that cooling period, topped with a scoop of good quality vanilla bean ice cream. The hot, gooey chocolate mixing with the cold cream? Heaven!
If you want something a little lighter, serve them chilled alongside some fresh, tart raspberries—the berries cut through the dark chocolate richness perfectly. Or, keep it simple: just dust them lightly with powdered sugar or extra good cocoa before slicing thinly. Check out my post on easy snack ideas for large groups for more presentation inspiration!
Storage and Reheating Instructions
Now this is important! If you somehow manage to have leftovers (which, honestly, rarely happens at my house), storing these beauties correctly keeps that amazing fudgy texture locked in. Honestly, these are definitely best eaten the day they are made, but they stay totally delicious for several days!
For short-term storage, keep them right on the counter at room temperature. Make sure they are completely cooled—this is key!—and then store them in an airtight container. If you stack them, use parchment paper squares between the layers so the tops don’t stick together or smudge that nice chocolate topping. They usually stay fantastic like this for about three to four days.
If you need them to last longer, you can absolutely pop them in the fridge. However, sometimes the fridge can make them a touch too firm. If you chill them, just remember one crucial thing: you must let them sit on the counter for about 30 to 45 minutes before serving to bring that wonderful gooeyness back. Don’t rush it!
Need a quick melt fix? If you are craving that fresh-out-of-the-oven drizzle, try reheating individual squares very briefly in the microwave. I mean literally 10 to 15 seconds on medium power! This warms them up perfectly to bring back the meltiness in the chocolate chips without turning the edges hard or dry. You want warm, soft, and gooey—not piping hot!
Frequently Asked Questions About This Fudgy Brownie Recipe
I get so many messages asking about tweaking these brownies, which just proves how much everyone loves them! It’s wonderful to see so many people making these as crowd pleasing treats. Here are the top questions I get asked all the time about getting that perfect texture.
Can I make these Ultimate Fudgy Dark Chocolate Brownies ahead of time?
Absolutely, yes! I prefer them the day after baking, honestly. Once they are completely cool—and I mean completely, don’t rush it!—store them airtight at room temperature. They stay wonderfully moist for about four days. Baking ahead is perfect for parties!
What makes this a true fudgy brownie recipe instead of cakey?
That’s all down to chemistry, my friend! This is a true fudgy brownie recipe because we load it up with fat (butter and oil) and use less flour relative to the sugar and eggs. The most important bit is gentle mixing once the dry ingredients hit the wet ones. If you mix hard, you sneak air in, and that turns them cakey!
Is this considered a one bowl baking method?
Pretty much! I love this recipe because it’s such easy one bowl baking. You combine all the wet ingredients in one bowl, and then you sift the dry ingredients right into that same bowl to fold together. It saves so much washing up!
If you have other questions about ingredients or dietary needs, please don’t hesitate to reach out to me through my contact page!
Nutritional Estimates for Ultimate Fudgy Dark Chocolate Brownies
Now, these brownies are definitely an indulgent treat—they are packed with dark chocolate goodness, after all—so let’s look at the numbers. I always include this section because being mindful of what we eat is important, even when enjoying something this delicious! These are estimates based on the ingredients listed above, divided into 16 servings just as the recipe dictates.
I made sure to list out the key figures for you below, but remember these can change slightly depending on the exact brand of cocoa or chocolate you choose. If you are interested in learning more about making those dietary choices for your family, you can read a little about my approach over on my About page!
- Calories: Approximately 350 per brownie
- Fat: About 19g (Watch that saturated fat, that’s where the richness comes from!)
- Carbohydrates: Around 46g
- Sugar: Roughly 36g (Worth every single gram, I promise!)
- Protein: A small boost at 3g
Just a little disclaimer here—these figures are purely an approximation based on standard ingredient weights. Think of it as a guideline, not a guarantee written in stone! Enjoy these incredible dark chocolate desserts knowing they bring joy to every bite.
Ultimate Fudgy Dark Chocolate Brownies
Ingredients
Equipment
Method
- Preheat oven to 175°C | 350°F.
- Lightly grease an 8×12-inch baking pan with cooking oil spray. Line with parchment paper and set aside.
- Combine melted butter, oil, and sugars together in a medium-sized bowl. Whisk well to combine. Add the eggs and vanilla; beat until lighter in colour for about one minute.
- Sift in flour, cocoa powder, and salt. Gently fold the dry ingredients into the wet ingredients until just combined. Do not over beat, as this affects the texture.
- Fold in 3/4 of the chocolate pieces.
- Pour batter into the prepared pan, smoothing the top evenly, and top with the remaining chocolate pieces.
- Bake for 25-30 minutes for fudgier texture, or until the center no longer jiggles and is just set to the touch. If you prefer well set and firm brownies, bake for 35-40 minutes. Brownies continue to set in the hot pan out of the oven.
- After 15-20 minutes, carefully remove them out of the pan and allow them to cool to room temperature before slicing into 16 brownies. They set while they cool.
Nutrition
Notes
Tried this recipe?
Let us know how it was!
Gluten-Free Nutritionist & Family Meal Planning Expert
Working as a pediatric dietitian at Children’s Hospital of Denver, I kept meeting families overwhelmed by managing their children’s celiac disease. Parents stressed, kids frustrated, everyone eating bland boxed “gluten-free” products.
That’s when I realized my calling: creating practical, balanced gluten-free solutions for real families with busy schedules. I’ve developed 375+ family-friendly recipes focusing on lunch boxes, after-school snacks, and make-ahead dinners that actually work.
My meal planning system was featured in Parents Magazine, and I presented research at the Rocky Mountain Pediatric Nutrition Conference. My evidence-based approach ensures recipes meet both taste and health standards—families need solutions that work in the real world, not just perfect test kitchens.