Potatoes. Aren’t they just the most underrated vegetable? We all know they are easy, but getting them truly crispy feels like a baking puzzle, right? Well, I finally nailed the secret, and transforming humble little spuds into show-stopping Crispy Smashed Potatoes with Herbed Butter is much easier than you think! You get maximum crispiness with almost zero fuss. I remember one absolutely perfect summer evening when my cousin showed me this technique for a family feast. We laughed so hard while smashing them, and when that rich smell of garlic and parsley filled the kitchen from the herbed butter, everyone stopped what they were doing just to breathe it in. That night, I realized simple food always makes the best memories. As a Gluten-Free Nutritionist and Family Meal Planning Expert, I promise this recipe is easy enough for busy weekday dinners but impressive enough for company!
Why You Will Love These Crispy Smashed Potatoes with Herbed Butter
Seriously, if you think potatoes are just a boring side, prepare to be amazed! I’ve perfected this method because, frankly, we deserve amazing food even on Tuesday nights. Here’s why this smashed potatoes recipe has become a staple in my house:
- They are incredibly easy! We boil them until tender, smash them, and then the oven does all the hard work.
- The ultimate texture contrast: super creamy inside but beautifully crisp and crackly on the outside.
- That herbed butter topping? It’s magic. Fresh parsley and garlic make everything taste better, no question.
- They are naturally gluten-free, so they fit right into our family’s dietary needs without feeling like a compromise.
- They are fantastic for entertaining. I always bring these when someone asks for party appetizer ideas because they are always gobbled up first!
- You probably have most ingredients right now, making this a perfect last-minute side dish that feels gourmet. You can find lots of other quick favorites here!
Gathering Ingredients for Crispy Smashed Potatoes with Herbed Butter
Okay, let’s talk supplies! The beauty of these crispy potato sides is that they rely on simple, honest ingredients. We need great potatoes and the flavor kick from our fantastic herbed butter topping. Don’t skimp on the quality of your butter or herbs here; it makes a huge difference!
For the Potatoes and Boiling Salt
Yukon Golds are my absolute go-to. They get wonderfully creamy inside and hold up perfectly when smashed, avoiding that mushy texture we hate. Make sure you scrub these babies!
- 1.5 pounds baby Yukon gold potatoes (you should get about 10 to 14 potatoes total)
- 2 tablespoons kosher salt (this is for the water to season the spuds deeply)
- 0.75 teaspoon kosher salt (this is the rest of it, for the butter mix)
For the Herbed Butter Topping
This is where the aroma starts! Always reach for fresh parsley. Dried herbs just don’t cut it when you’re aiming for that “wow” factor. Fresh garlic grated super fine melts right into the butter, which is just heavenly.
- 4 tablespoons unsalted butter (that’s half a standard stick, folks)
- 1 tablespoon garlic, grated down until it’s practically paste
- 2 tablespoons fresh parsley leaves, finely chopped
- 0.25 teaspoon black pepper, freshly ground
Essential Equipment for Making Crispy Smashed Potatoes with Herbed Butter
You don’t need a kitchen full of fancy gadgets for an amazing side dish like this, which is great news when you’re trying to keep things simple! Having the right basics ready ensures a smooth process between boiling, smashing, and roasting.
I always make sure these three pieces are clean and on the counter before I even put the water on the stove:
- A large saucepan—you need enough room for those potatoes to boil comfortably without spilling everywhere when you add the water!
- A good, sturdy rimmed baking sheet. This is crucial because we are roasting these babies at high heat, and we want that sheet lip to contain any butter drips.
- Something solid for smashing! I usually grab the base of a heavy drinking glass or a small, flat measuring cup. It gives you the perfect flat surface without tearing the potato apart unevenly.
Step-by-Step Instructions for the Smashed Potatoes Recipe
This is where the magic happens, friend! Don’t get intimidated by the high oven temperature; that’s what guarantees the crunch we want in our crispy potato sides. We need to take our time with the first step to set ourselves up for success. Once they’re boiled, it’s all about getting that butter mix on them and pressing them gently. If you want to see how others tackle this, check out this great article for more inspiration here, but I think my way is the best for weeknights!
Boiling and Tenderizing the Potatoes
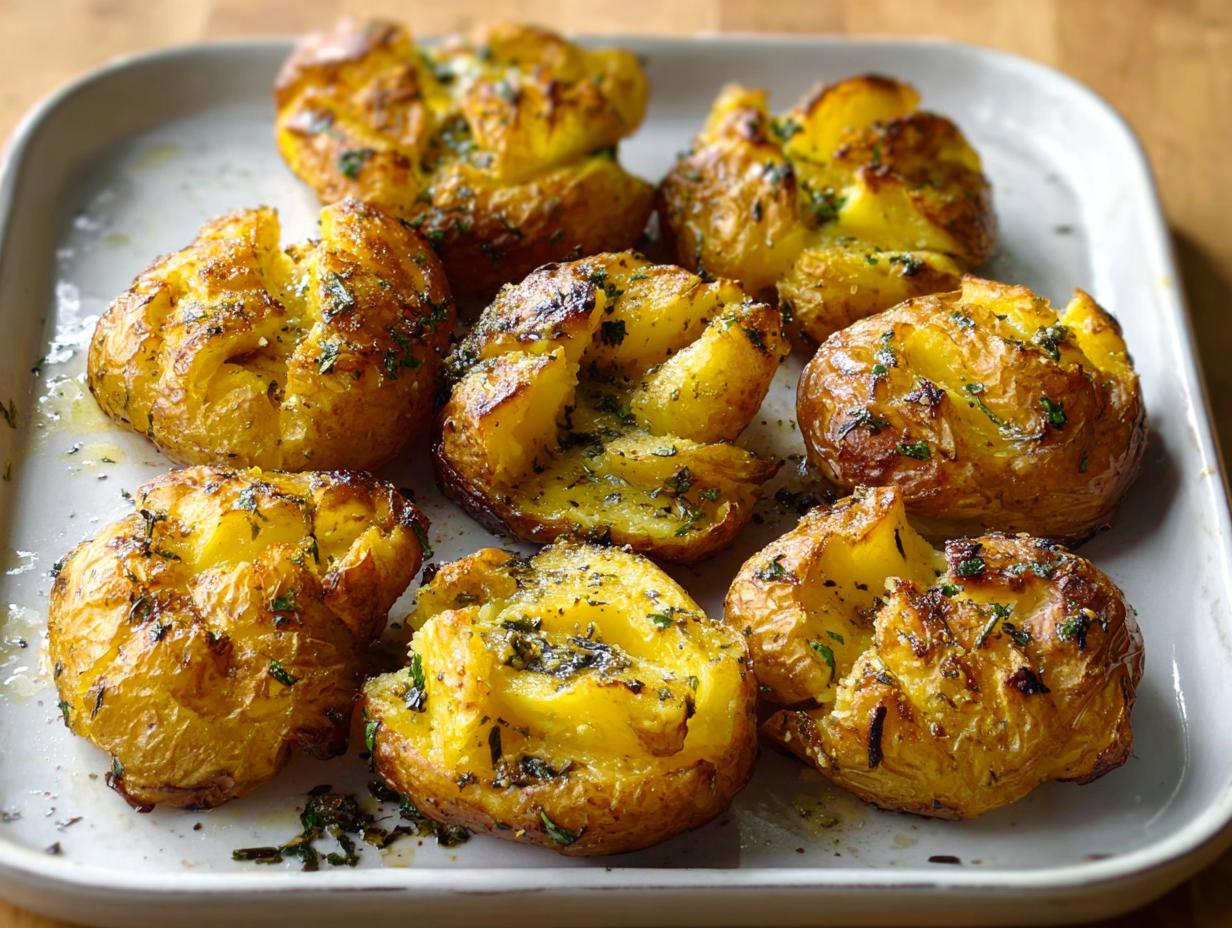
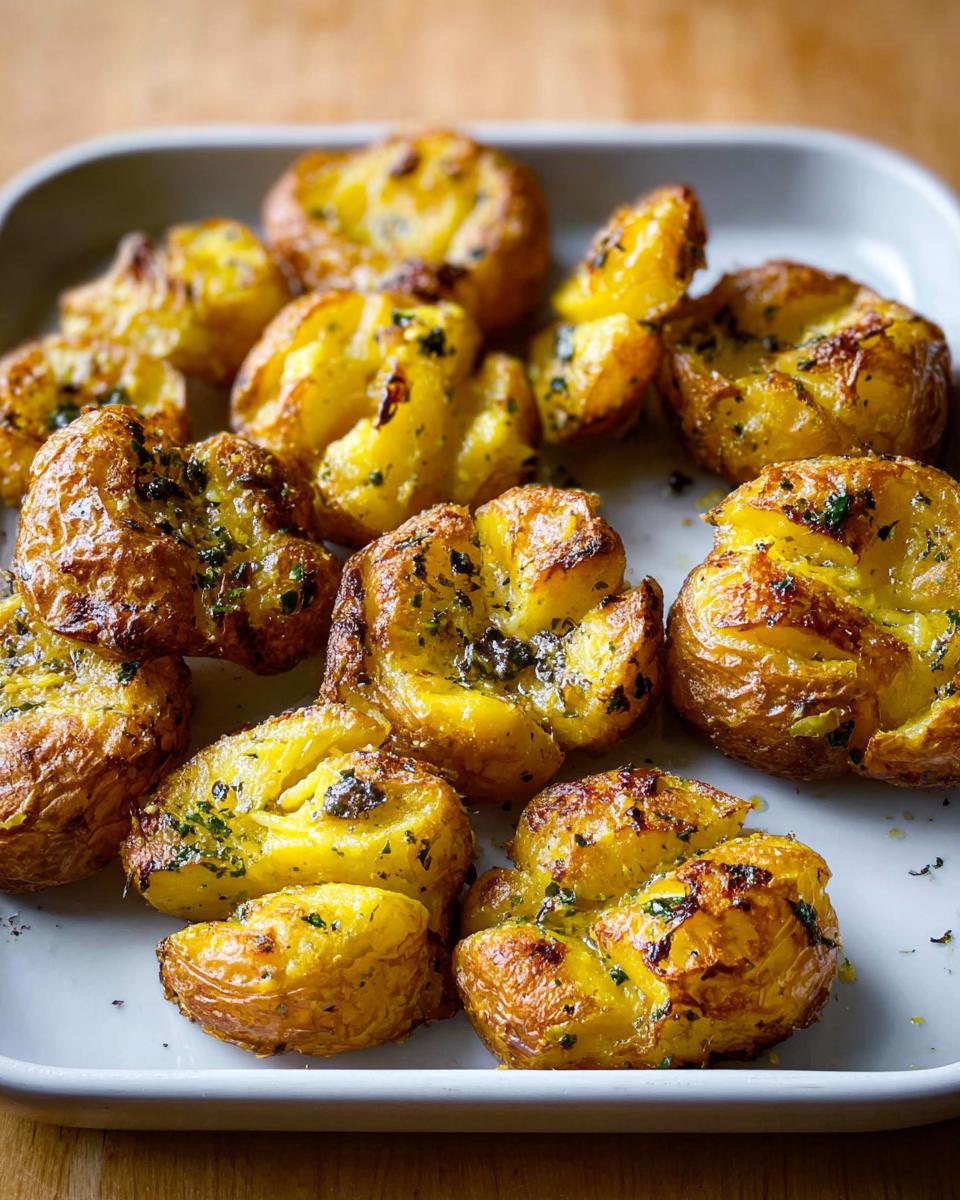
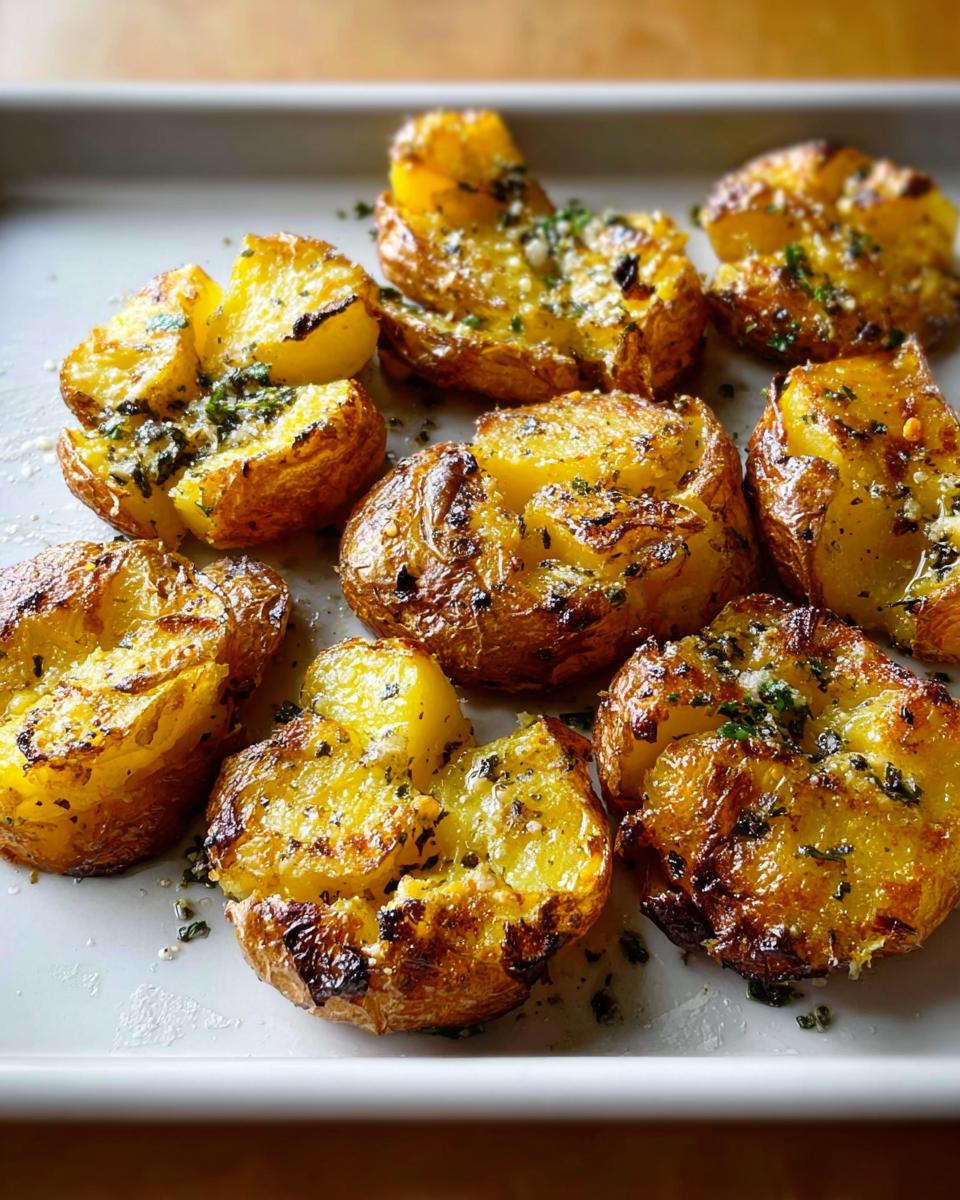
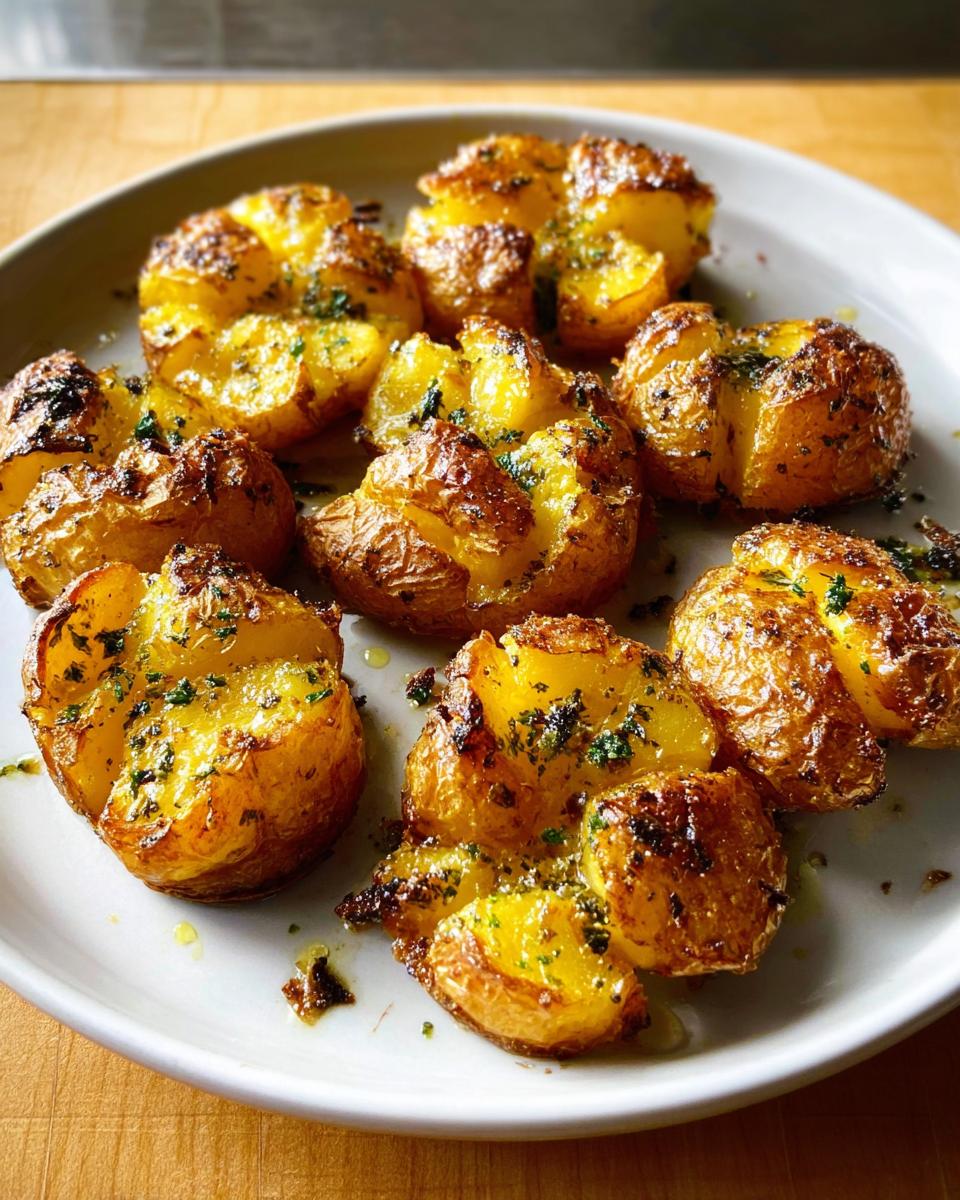
First thing, give those little Yukon Golds a really good scrub under the tap. Throw them into your large saucepan. Now, cover them with cold water—make sure that water level is about an inch above the spuds. Toss in those 2 tablespoons of kosher salt—don’t be shy; they need that internal seasoning! Bring the water to a hard boil over high heat, then immediately dial it back so they just simmer away gently. You want them truly, completely fork-tender. This usually takes about 20 to 25 minutes depending on how small they are. Once they pass that knife test easily, drain them completely. They must be dry before moving on!
Preparing the Flavorful Herbed Butter Topping
While those potatoes are getting tender, let’s get the oven screaming hot—we’re preheating it to 500°F, and I like to make sure my racks are divided into thirds. Now, take that 4 tablespoons of butter and melt it slowly in the same pot you used for boiling (less cleanup, yay!). Once it’s liquid, pull the pot off the heat. Quickly stir in your grated garlic, chopped fresh parsley, the remaining salt, and that black pepper. Give it a good whisk until everything is combined. Remember the potatoes need to go straight into this warm butter mixture once they’re drained!
Smashing and Achieving Crispy Potato Sides
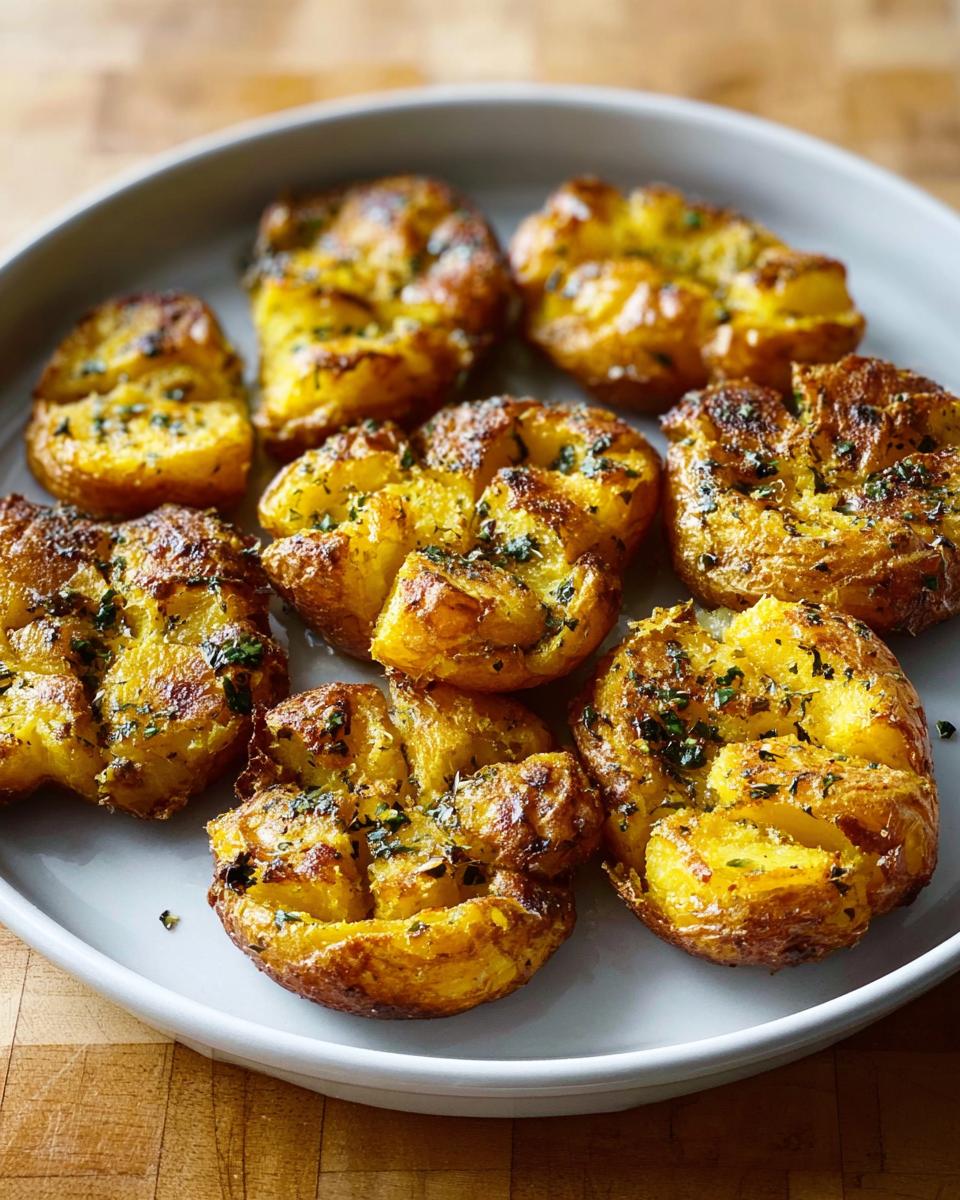
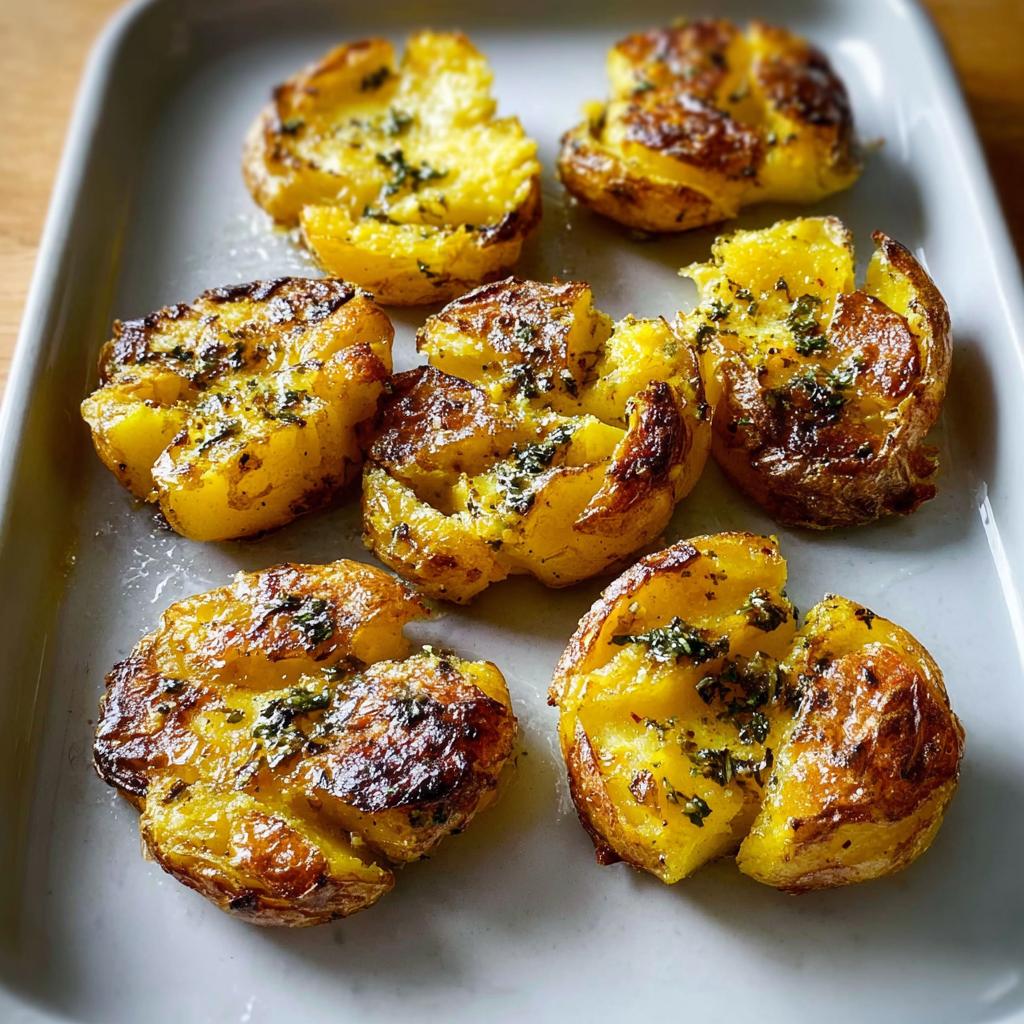
Toss those drained potatoes right into the herbed butter in the pot and gently coat every single one. Now, pour the whole buttery, herbed mess onto your rimmed baking sheet. Grab that drinking glass or whatever you’re using and gently, but firmly, press down on each potato. I aim for about a 3/4-inch thickness; you should see the potato split open nicely in the middle. Start them off on the lower rack for about 10 minutes—this sets the bottom until it’s golden brown. Then, move the sheet up to the higher rack for another 10 to 15 minutes until the tops look deeply browned and super crispy. You can find more easy family flavors like my Caprese Skewers recipe right here!
Expert Tips for Perfect Crispy Smashed Potatoes with Herbed Butter
Getting that beautiful crust on these potatoes comes down to a few non-negotiable steps, trust me. As a nutritionist, I’m always focused on technique because it’s what maximizes flavor without adding unnecessary junk!
The absolute number one rule for ultra-crispy results? Those potatoes must be dry after boiling. If they are wet when they hit the hot butter, they steam instead of crisping up! You can blot them gently with a clean kitchen towel before smashing if you feel they look damp.
And here’s a little trick my mom taught me: if Yukon Golds are sold out, these work great with small red potatoes too, though they tend to be a little waxier. For reheating, skip the microwave! It turns them soggy instantly. Pop them back on a sheet pan for five minutes at 400°F to revive that crispness. You can browse more of my favorite family go-tos, like my Classic Deviled Eggs, for your next spread!
Making Crispy Smashed Potatoes with Herbed Butter Ahead of Time
I totally get it—sometimes the weeknight dinner rush means you need a side dish prepped and ready to go. Good news! These potatoes are fantastic for making ahead, which leaves you completely free to focus on the main course when company arrives. You can handle the boiling and the butter prep a day or even two days early, which frees up so much time!
For the potatoes, boil them until they are tender as required, drain them, and let them cool completely on the baking sheet. Don’t smash them yet! Store the cooled, boiled potatoes tightly wrapped in plastic wrap in the fridge. Make sure to make that rich herbed butter topping ahead of time too! Just melt the butter, mix in the garlic and herbs, and store it covered in the fridge. It solidifies, but don’t worry about that.
When you’re ready to serve, pull both the potatoes and the butter out about 30 minutes beforehand so they can warm up a little. Then, you toss the cooled potatoes gently in the slightly softened butter, smash them down on your baking sheet just like the recipe says, and head straight to the 500°F oven! I find that because the potatoes are already cooked, the actual roasting time for them to get crispy is slightly shorter—maybe peek at them after 8 minutes on the bottom rack.
When I bring these out for parties, I often have the butter ready in a small jar and the potatoes boiled. It cuts my active time right down! It’s such a relief when entertaining, just like having my famous guacamole ready to go. Preparation is the key to fun hosting, I always say!
Serving Suggestions for Your Crispy Smashed Potatoes with Herbed Butter
Honestly, these potatoes are so flavorful they can steal the show! For busy weeknights, they pair perfectly with a simple roasted chicken or maybe a grilled steak. The richness of the herbed butter topping really cuts through the heft of the meat. They look fantastic next to baked salmon too.
But if you are looking for great party appetizer ideas, just set them out on a platter with small toothpicks! They are perfect alongside things like cheese boards or my infamous bacon-wrapped dates. Everyone loves grabbing a crispy potato bite!
Frequently Asked Questions About This Smashed Potatoes Recipe
I get so many little questions about these potatoes after readers try them, which is wonderful! It usually means people are excited to get that perfect crunch. Here are some of the things I hear most often when people are trying to make the best smashed potatoes recipe possible.
Can I use a potato other than Yukon Gold?
This is a super common question! Yes, you absolutely can, but you might tweak the boiling time slightly. Yukon Golds have the best balance of starch and moisture for that fluffy interior/crispy exterior mashup. If you use small red potatoes, you’ll get slightly firmer results, which can be great too! Just make sure they are all roughly the same size for even cooking. If you swap them out, remember my advice: they need to be very tender before you start the smashing part!
What is the absolute best tip for achieving super crispy potato sides?
Okay, if you want shatteringly crisp results, you need two things: high heat and dry surfaces. Preheat your oven to 500°F well ahead of time—we need that blast of heat! But truly, the main secret is draining the potatoes completely after boiling. I stress this again and again: Pat them dry if you need to! If there’s surface moisture when they hit the hot butter, they steam, and steaming is the enemy of crispy. A good, high-sided baking sheet helps concentrate the heat around the edges, too.
Can I serve these potatoes without the butter, or use oil instead?
You *can*, but oh boy, you’ll be missing out on so much flavor! The herbed butter topping is what elevates these from simple roasted potatoes to something special. Butter browns beautifully and carries the garlic and parsley flavor so much better than oil alone. If you absolutely must avoid dairy for dietary reasons, you can use a high-quality olive oil instead, but I’d suggest steeping your herbs in the warm oil for a few minutes before tossing the potatoes in, similar to how you treat the butter.
Are these easy enough to serve as a party appetizer idea?
Absolutely, they are one of my favorite party appetizer ideas because they look so rustic and impressive! People love picking up a single smashed potato. For parties, I suggest making them slightly smaller than usual—maybe use the very smallest baby potatoes you can find—so they are truly one-bite or two-bite wonders. I usually serve them alongside a lighter dip, maybe some of my easy queso dip if I’m feeling decadent, but they stand perfectly well on their own!
Storing and Reheating Leftover Crispy Smashed Potatoes with Herbed Butter
I always hope there are leftovers of these delicious potatoes because they are surprisingly good the next day, provided you reheat them correctly! Remember, the microwave is the enemy here—it turns that perfect crispiness into sad, steamed mush almost instantly. We want to bring back that golden crunch we worked so hard for!
If you find yourself with extra Crispy Smashed Potatoes with Herbed Butter, getting them stored properly is key. You can definitely keep them in the fridge for up to three days. They should be stored in an airtight container, making sure they cool down completely before you seal the lid, otherwise, the trapped steam ruins the texture. If you think you won’t eat them within three days, go ahead and pop them in the freezer. They freeze quite nicely, too!
When freezing, lay the cooled, already-smashed potatoes in a single layer on a baking sheet, then freeze them solid for an hour. Once they are hard little nuggets, transfer them to a heavy-duty freezer bag. This prevents them from sticking together in one giant potato brick. They will last happy and intact for about two months in the freezer.
To reheat, the oven is always my first choice for bringing back that gorgeous crispness. Preheat your oven to 400°F. Arrange the refrigerated or frozen potatoes in a single layer on a clean baking sheet—don’t crowd them! If they are room temperature, about 10 to 12 minutes should do the trick, just until they are heated through and the edges look golden again. If you are using ones straight from the freezer, you’ll need closer to 18 to 20 minutes, maybe giving them a quick check halfway through.
If you have an air fryer, definitely use it! It is even faster than the oven for reheating leftovers. Just toss them in the basket, set it to 375°F, and after about 6 to 8 minutes, they will taste almost exactly like they just came out of the oven. It’s my favorite quick fix!
If you’re serving them as a side for a bigger spread, maybe consider pairing them with some of my famous mini pigs in a blanket—the combination of salty potato and savory wrapper is irresistible!
Crispy Smashed Potatoes with Herbed Butter
Ingredients
Equipment
Method
- Scrub the baby Yukon gold potatoes clean and place them in a large saucepan.
- Add cold water to cover the potatoes by about one inch. Stir in 2 tablespoons of the kosher salt, place the pan over high heat, and bring the water to a boil.
- Reduce the heat and simmer until the potatoes are very tender and pierce easily with a sharp knife. This takes 20 to 25 minutes. Drain the potatoes and set them aside.
- Arrange two racks to divide the oven into thirds and heat the oven to 500°F. Place 4 tablespoons of unsalted butter in the empty pot and melt it over low heat. Remove the pot from the heat and stir in the grated garlic, chopped fresh parsley, 1/4 teaspoon black pepper, and the remaining 3/4 teaspoon kosher salt.
- Add the potatoes to the herbed butter mixture and toss to coat them completely.
- Pour the potatoes and any extra melted butter mixture onto a rimmed baking sheet. Use the bottom of a lightly greased drinking glass or measuring cup to press down on each potato until it splits open and flattens to about 3/4-inch thick.
- Roast the potatoes on the lower rack until the bottoms are golden-brown, about 10 minutes. Move the baking sheet to the higher rack and roast until the tops are brown and crispy, about 10 to 15 minutes more. Serve the potatoes warm.
Notes
Tried this recipe?
Let us know how it was!
Gluten-Free Nutritionist & Family Meal Planning Expert
Working as a pediatric dietitian at Children’s Hospital of Denver, I kept meeting families overwhelmed by managing their children’s celiac disease. Parents stressed, kids frustrated, everyone eating bland boxed “gluten-free” products.
That’s when I realized my calling: creating practical, balanced gluten-free solutions for real families with busy schedules. I’ve developed 375+ family-friendly recipes focusing on lunch boxes, after-school snacks, and make-ahead dinners that actually work.
My meal planning system was featured in Parents Magazine, and I presented research at the Rocky Mountain Pediatric Nutrition Conference. My evidence-based approach ensures recipes meet both taste and health standards—families need solutions that work in the real world, not just perfect test kitchens.