
You know those recipes that smell like a warm hug, even if you’re baking them on a dreary Tuesday? That’s exactly what happens when you start melting butter for my famous Brown Butter Banana Bread. When I first went gluten-free, I thought I had to leave all my grandmother’s cozy kitchen memories behind, especially the sweet, comforting flavors she taught me. But one rainy afternoon, watching that butter sizzle and transform into that gorgeous golden brown, the nutty aroma filled my little kitchen. Wow! It truly wrapped me up like one of Nonna’s old blankets. This recipe is my way of saying we can absolutely bring heritage and tradition forward, even when we bake a little differently now. Every slice is pure joy and so rich! You can read a little more about my recipe heritage right here on my about page.
Why This Brown Butter Banana Bread Recipe Works for You
Honestly, this isn’t just another quick bread recipe; it’s designed for satisfaction! Even though it’s crafted to be gluten-free, you won’t sacrifice a bit of that comforting classic taste. This is the perfect staple for your weekend baking projects.
- It delivers incredible depth—those beautiful brown butter desserts flavor notes just can’t be beaten.
- You get that deeply moist and rich banana bread texture we all dream about.
- It’s simple enough for an early morning bake without needing a million steps!
Deep Flavor from Browning Butter
When you brown the butter, you’re actually toasting the milk solids. Trust me, it releases this incredible, complex, nutty aroma that standard melted butter just can’t touch. It takes less than five minutes, but it transforms the whole experience!
Perfect Texture for Gluten-Free Baking
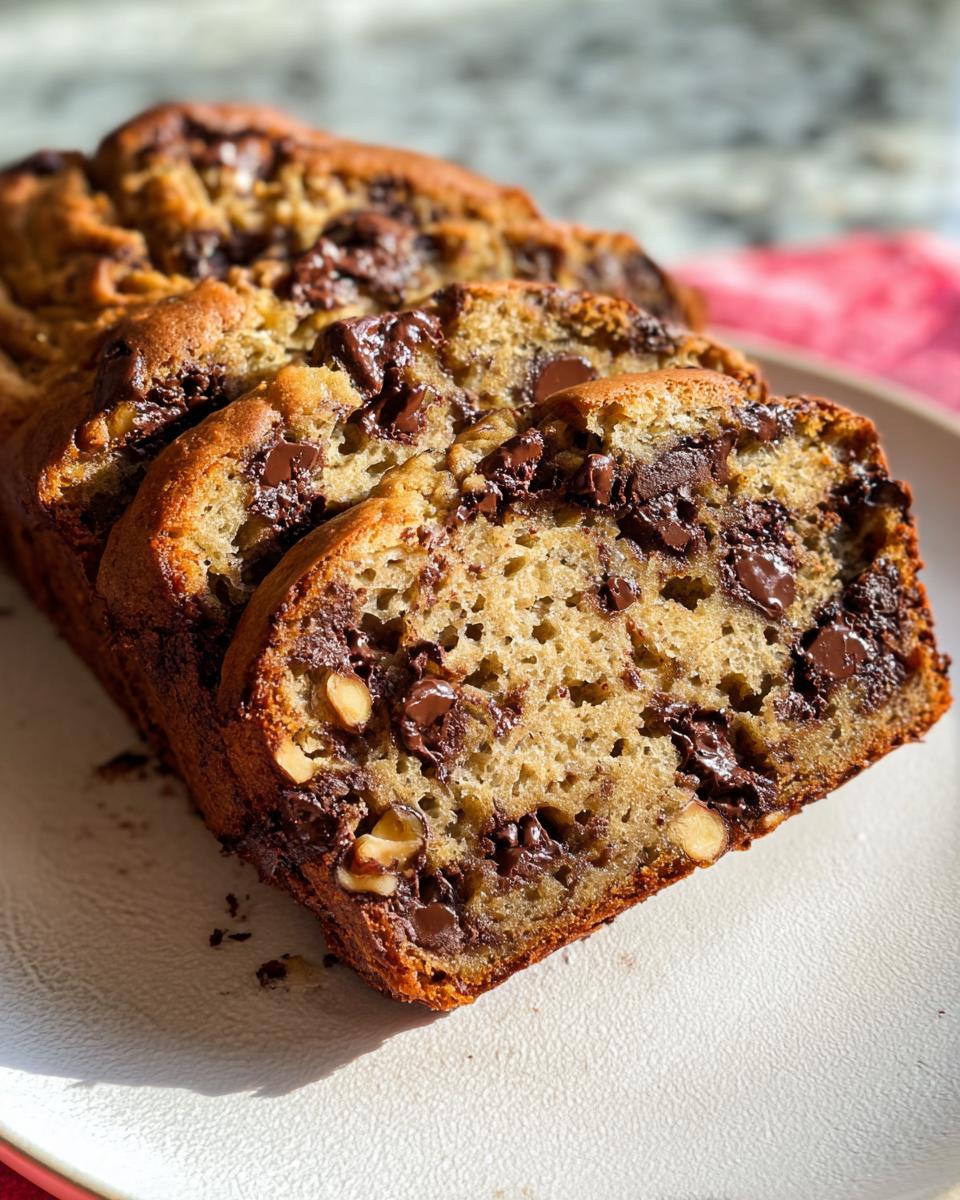
Dealing with gluten-free flours can sometimes mean crumbly loaves. Not here! The fat from the brown butter, combined with those super ripe, mashed bananas, locks in moisture. It keeps the loaf tender and stops it from falling apart when you slice it.
Essential Ingredients for Rich Banana Bread
When you see the ingredients list for this **Brown Butter Banana Bread**, you might notice it looks pretty standard—but those little details make all the difference, especially when we’re keeping it gluten-free! Remember, every component here is working hard to achieve that rich banana bread flavor.
Here is what you’ll need for one perfect loaf:
For the Bread
- 1/2 cup unsalted butter (this is for browning, hold onto that!)
- 1 cup brown sugar (make sure it’s packed in tight!)
- 3 large mashed overripe bananas (and I mean truly speckled and soft!)
- 1 large egg
- 1 teaspoon vanilla extract
- 2 to 4 tbsp milk (we only add this if the batter is overly stiff)
- 2 cups flour (remember, we use our favorite gluten-free blend here)
- 1 teaspoon baking powder
- 1/4 teaspoon salt
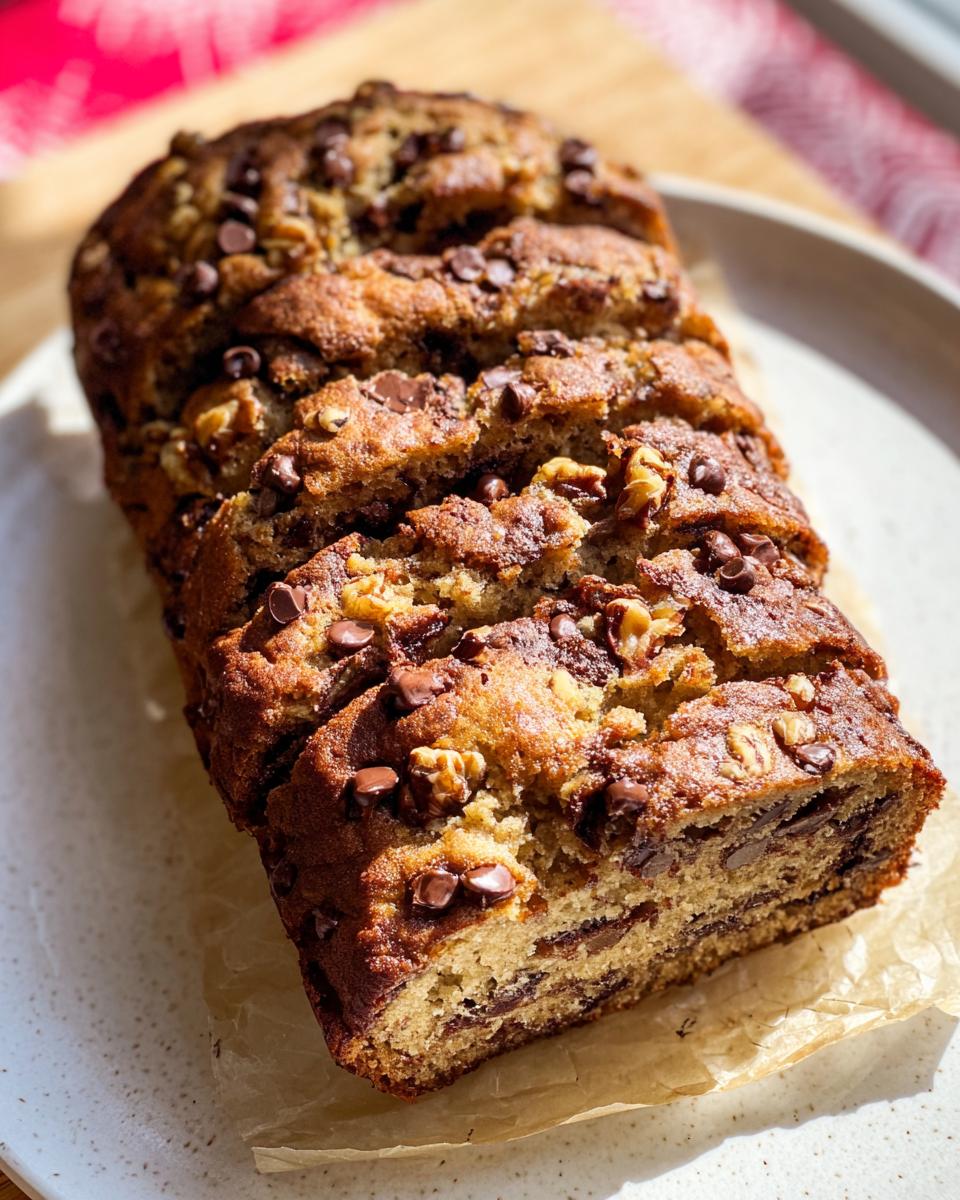
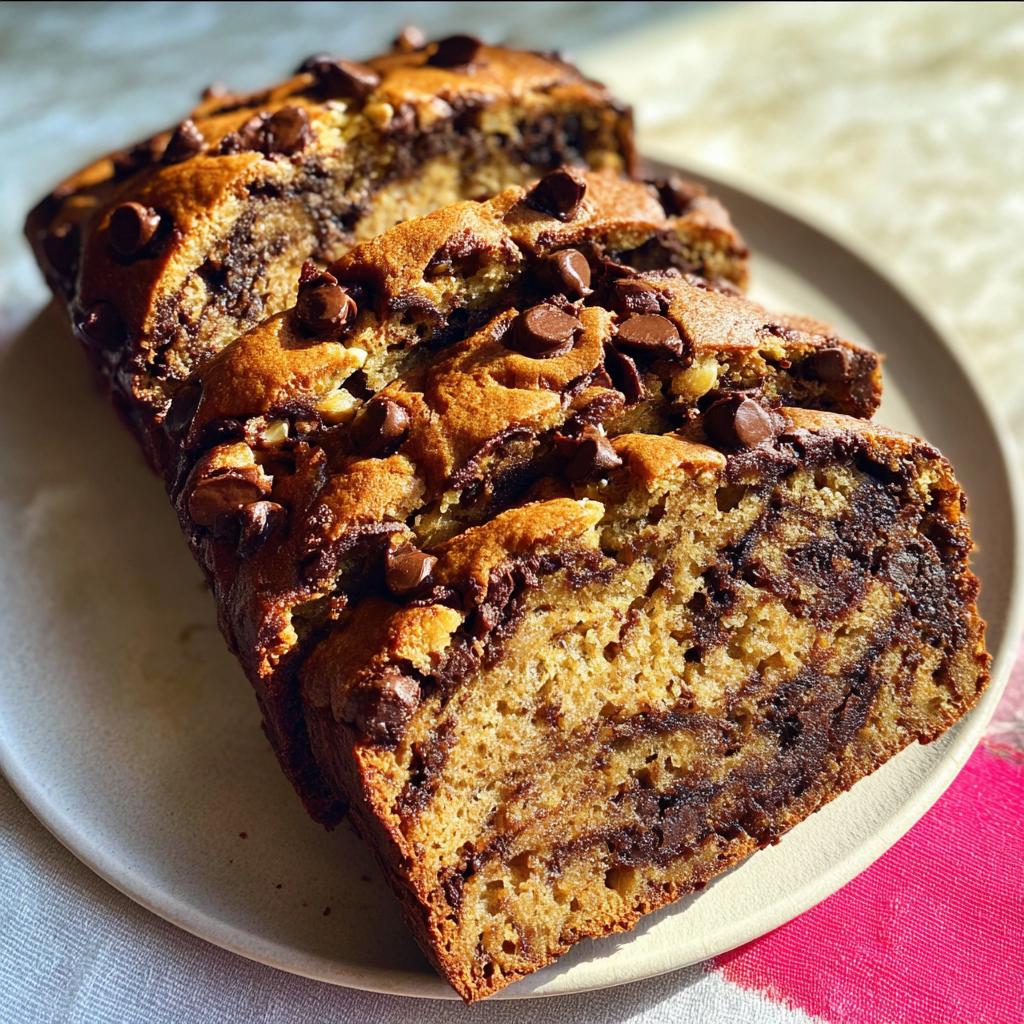
- 1 cup semi-sweet chocolate chips (don’t skip these!)
- 1/2 cup walnuts or pecans (optional, but so good for texture)
If you want a deeper dive into some of my other favorite gluten-free baking staples, you can check out my guide on gluten-free bread bases.
Ingredient Notes and Substitution Ideas
The quality of those starting items sets the stage for baking success, so listen to me on these three things. First, that butter *must* be browned. It’s non-negotiable for the flavor profile of these brown butter desserts. If you forget it halfway through, that nutty depth disappears!
Second, bananas. They need to look a little tragic, honestly. The blacker and mushier they are, the sweeter they are, and the less dry your loaf will be. Don’t use yellow bananas!
For the nuts, if you or a guest has an allergy, just leave them out entirely! The texture is still fantastic without them. Alternatively, if you want a different crunch, try swapping in roasted sunflower seeds. They add a lovely earthy note that plays well with the brown butter.
Step-by-Step Instructions for Perfect Brown Butter Banana Bread
Okay, time to put on your apron! This is where the magic really happens. Don’t rush the first couple of steps, because that brown butter is the soul of this loaf. We start by getting the oven ready and preparing your pan so we can move quickly once the batter is mixed.
- First thing’s first, get your oven heated up to 350°F (175°C). We want that center rack nice and ready.
- Prep your 9×5-inch loaf pan now. You can grease and flour it, or line it with parchment paper which I always prefer—it makes lifting the loaf out later a total breeze!
Mastering the Brown Butter Technique
Grab a medium saucepan. Melt that half-cup of butter over medium-low heat. You’ll see it melt, then start to foam up a bit. Keep swirling the pan, just gently! Soon, you’ll notice a beautiful golden brown color forming at the bottom, and the smell will change instantly to this rich, nutty perfume. That’s your sign it’s done! Take it *off* the heat immediately because it can go from perfect to burnt in two seconds flat. Pour that lovely browned butter into a heatproof bowl so it can cool down before we add the eggs.
Mixing Wet and Dry Components for Brown Butter Banana Bread
While the butter cools down just a little, mash up those three overripe bananas in a large bowl until they are smooth and creamy. Then, whisk in the cooled brown butter, the packed brown sugar, your egg, and the vanilla. Whisk it well until everything looks happy together!
In a separate bowl, whisk your dry ingredients: flour, baking powder, and salt. Now, pour those dry bits into the wet mixture. Gently fold with your rubber spatula—I mean GENTLY! We are mixing until just combined; seeing a few flour streaks is totally fine. If the batter seems stiff, add 2 to 4 tablespoons of milk until it loosens up. Finally, fold in those chocolate chips and nuts. Don’t stir too much, or we lose that gorgeous texture we worked for!
Baking and Cooling Your Loaf
Pour that beautiful batter into your prepared pan and smooth the top. Now, pop it into your 350°F oven. It will take about 55 to 65 minutes to bake through. Here’s the trick: if the top starts looking too dark halfway through baking, just cover that loaf loosely with some foil. When a toothpick inserted near the center comes out clean, it’s done! Don’t rush the cooling! Let it hang out in the pan for about 10 minutes. Then use that parchment sling or run a knife around the edges and transfer it to a wire rack to cool completely before slicing into this amazing loaf.
For more inspiration on making delicious baked goods, check out this wonderful chocolate chip version!
Tips for Success with Your Brown Butter Banana Bread
Even with a clear recipe, sometimes the difference between a good loaf and an absolutely *spectacular* loaf comes down to those little kitchen secrets you pick up over time. Since this is a gluten-free take on a classic, we need to be extra thoughtful about texture. These little adjustments guarantee you get that moist, rich banana bread every single time.
Here are my top tricks for mastering this bake:
- Use Cold Mixing Bowls for Butter (But Not for Bananas!): When you’re creaming things together—after the brown butter has cooled down—make sure your main mixing bowl is cool! This helps the brown butter solidify slightly again, trapping those air bubbles really well when you mix the sugar in. It builds structure, which is essential in gluten-free baking.
- The Double Banana Test: If your bananas look yellow-speckled instead of truly black, add one small extra banana, or even just a spoonful of applesauce. The moisture transfer from the fruit is key to keeping our gluten-free structure happy and preventing dry corners.
- A Gentle Rest Before Baking: This is something I only started doing recently, but wow, what a difference! If you have the time—and this is why it’s a great weekend baking project—let the finished batter sit on the counter for about 15 minutes before it goes into the oven. This gives the gluten-free flour blend a chance to fully hydrate from the wet ingredients. It results in a far less crumbly slice!
- The Foil Tent is Your Friend: Loaf cakes, especially dense ones, cook unevenly. Don’t wait until the top is scorched before you cover it! Tent that aluminum foil over the top around the 35-minute mark, even if you think it looks okay. It traps steam and heat, forcing the center to bake through beautifully without burning those lovely chocolate chips on top.

If you want to explore more tips specifically about keeping your gluten-free loaves light and fluffy, I covered my best secrets over on my main banana bread resource page!
Serving Suggestions for This Brunch Recipe
This **Brown Butter Banana Bread** is far too delicious to only eat as a plain snack; it absolutely begs to be served up fancy for brunch! Obviously, a perfect cup of strong coffee or maybe even a latte is the only way to start. The nutty brown butter pairs so wonderfully with dark roasts, you won’t believe it.
When I serve this loaf for company, I always offer a side of softened, high-quality salted butter, or sometimes even a drizzle of maple syrup if the bananas weren’t super sweet on their own. For a truly decadent experience, a dollop of lightly sweetened mascarpone cheese is divine. For more breakfast and brunch ideas perfect for the weekend, head over to my brunch collection!
Storing Leftovers of Your Brown Butter Banana Bread
Oh goodness, this loaf smells so incredible that you might think it won’t last five minutes in the house, but leftovers are common! Because we worked so hard to get that moisture locked in with the brown butter and bananas, proper storage is key to keeping your **Brown Butter Banana Bread** tasting fresh.
Here’s my routine:
- Room Temperature: If you plan on eating the whole loaf within two days—which honestly, you probably will!—just leave it tightly wrapped on the counter. I wrap it snugly in plastic wrap, and then I sometimes wrap that again in foil. This prevents any air from getting to it and drying out that lovely crumb.
- Refrigeration: If you know you won’t finish it within 48 hours, go ahead and refrigerate it. Cold temperatures can sometimes make gluten-free items feel a little firmer or denser, but that’s okay; we fix that easily when we reheat it.
- Freezing for Later: This loaf freezes like a dream! Slice it first—which is easier than trying to cut a frozen loaf—wrap the individual slices tightly in plastic wrap, and then place them all in a freezer-safe bag. It lasts great for about two months.
Microwave Reheating Magic for a Rich Banana Bread Slice
Never, ever eat a cold slice straight from the fridge if you can help it! Reheating brings that butter right back out and makes the whole slice taste freshly baked. I take a slice, wrap it loosely in a slightly damp paper towel—just slightly damp, don’t soak it!—and microwave it for about 15 to 20 seconds.
The steam from the paper towel traps moisture while the microwave warms it up. When it comes out, it’s soft, fragrant, and tastes just like it came out of the oven, even if it’s been in the fridge for three days. It brings back all those amazing, rich banana bread aromas!
When to Enjoy Your Frozen Loaf
If you froze your slices, the reheat process is slightly different, but just as delicious! Pull the frozen slice out of the freezer/wrapping and wrap it in that same slightly damp paper towel. Microwave it for about 45 seconds to a minute. If you’re really impatient, you can pop it into a toaster oven for a few minutes until just warmed through. Either way, you’ll have a wonderful snack ready in no time!
Frequently Asked Questions About Brown Butter Banana Bread
I get so many sweet notes from folks trying this recipe, and usually, the questions come down to technique or substitution. Don’t feel silly if you are wondering something—if I can help you achieve this perfect, **rich banana bread**, I’m happy to! Here are the most common things folks ask me about making their **Brown Butter Banana Bread**.
Can I make this Brown Butter Banana Bread without gluten-free flour?
Oh yes, absolutely you can! While I developed this recipe specifically to make sure my gluten-free journey didn’t mean giving up Nonna’s favorites, this bread formula is really sturdy. If you use your favorite all-purpose regular wheat flour instead of the gluten-free blend, it will bake up beautifully. Just know that the texture might be slightly different—maybe a tiny bit less tender than the GF version, but it will still be delicious and wonderfully rich. It’s all about enjoying those **brown butter desserts**!
How long does the brown butter need to cool before mixing?
This is such a crucial question because it could scramble your egg if you aren’t careful! You definitely need to take the butter off the heat the second it hits that nutty brown stage. You want the butter to cool down enough so that when you pour it into the banana mixture, it doesn’t cook that lovely single egg you added. I look for it to be warm, definitely not hot. Think of it like cooling down a lukewarm bath—it should feel warm when you dip your pinky in it, but not feel like it’s going to burn you. It should take about 5 to 10 minutes to reach that perfect temperature.
Why did my bread turn out dense instead of soft?
That’s the classic banana bread panic moment! Usually, density comes from two main places in a loaf this rich. First, you probably overmixed the batter after you added the flour. Remember, we are just trying to introduce the dry ingredients; mixing too much develops gluten (even in GF blends, too much agitation is bad!) and squeezes all the air out. Second, check your bananas! If they weren’t truly ripe—super spotty or even black—they won’t have enough natural sugar and moisture to lift the batter properly. A dense loaf is still tasty, but a soft, light crumb is what we aim for!
If you ever have a question while you’re baking, please don’t hesitate to reach out to me directly via my contact page. I love hearing from you!
Estimated Nutritional Information for Brown Butter Banana Bread
Whenever I share a recipe like this **Brown Butter Banana Bread**, people always ask about the numbers. It’s a wonderful, rich banana bread, so it’s decadent, but I always want to keep things transparent with you all!
Keep in mind that these numbers are just great estimates based on the ingredients I used, like the specific brand of gluten-free flour and the kind of chocolate chips I reached for. If you swap out ingredients, these values will shift a bit, so view this as a helpful guide rather than a strict nutritional mandate!
Here is the breakdown for one slice (based on 10 servings):
- Calories: 350
- Fat: 16g (Saturated Fat: 9g)
- Carbohydrates: 50g
- Sugar: 28g
- Protein: 5g
- Fiber: 2g
There’s definitely a little hit of energy here, which is perfect for those **weekend baking projects**! It’s comfort food, friends, but knowing the general makeup helps when planning your week. Enjoy every single bite!

Share Your Weekend Baking Projects
Whew! Now that your beautiful loaf of **Brown Butter Banana Bread** is cooling (or maybe you’ve already sneakily eaten the end bit—I won’t tell!), I would absolutely love to hear all about it!
This is what gets me out of bed on a Saturday morning—knowing that someone out there is enjoying a slice of comfort made with quality ingredients. Did you use the chocolate chips, or did you switch to something fun like espresso beans?
Please, if you made this **rich banana bread**, tell me how it went! Leave a comment below, let me know how many stars you’d give it, and most importantly, share your photos with me on social media!
I always feature favorites on my recipe pages, so tag me so I can see your creation. It truly means the world to me when you try these family-inspired bakes. You can browse all my other tested recipes, which are perfect for your next round of weekend baking projects, right here on my main index!
Happy baking, friends—I can’t wait to see your masterpieces!
Brown Butter Banana Bread
Ingredients
Equipment
Method
- Preheat your oven to 350°F (175°C) and adjust the rack to the center position.
- Melt the unsalted butter in a medium saucepan over medium-low heat. Swirl the pan occasionally. When the butter turns a golden brown color and smells nutty, remove it from the heat. Transfer the brown butter to a heatproof bowl to cool.
- Grease a 9×5-inch loaf pan or line it with parchment paper.
- In a large bowl, mash the overripe bananas with a fork until smooth.
- Add the cooled brown butter, brown sugar, egg, and vanilla extract to the mashed bananas. Whisk everything together until well combined.
- In a separate bowl, whisk together the flour, baking powder, and salt.
- Pour the dry ingredients into the bowl with the wet ingredients. Using a rubber spatula, gently fold the ingredients together until just combined. Do not overmix.
- If your batter seems too thick, add 2 to 4 tablespoons of milk to thin it slightly.
- Gently fold in the chocolate chips and any optional nuts until evenly distributed.
- Pour the batter into the prepared 9×5 pan and spread it evenly. You can top the batter with extra chocolate chips.
- Bake in the preheated oven for 55 to 65 minutes, or until a toothpick inserted into the center comes out clean. If the top browns too quickly, cover it with aluminum foil halfway through baking.
- Remove the bread from the oven and let it cool in the pan for about 10 minutes. Then, transfer the loaf to a wire rack to cool completely before slicing.
Nutrition
Notes
Tried this recipe?
Let us know how it was!
Gluten-Free Culinary Storyteller & Recipe Heritage Specialist
Getting diagnosed with non-celiac gluten sensitivity in my late twenties felt like losing my Italian identity. Growing up in nonna’s Brooklyn kitchen, learning traditional techniques that suddenly became off-limits—I decided to fight for those family food traditions instead of giving up.
With my food journalism background and European baking training, I became obsessed with recreating authentic flavors in gluten-free formats. I’ve adapted 400+ traditional recipes from various cultures, with my gnocchi recipe winning “Recipe of the Year” from the National Gluten-Free Living Awards in 2022.
I collaborate with the Italian-American Cultural Center to document traditional family recipes and volunteer with the Westchester Celiac Support Group, teaching monthly pasta-making classes.
Food is the heart of family storytelling. No one should sacrifice their cultural heritage due to dietary restrictions.