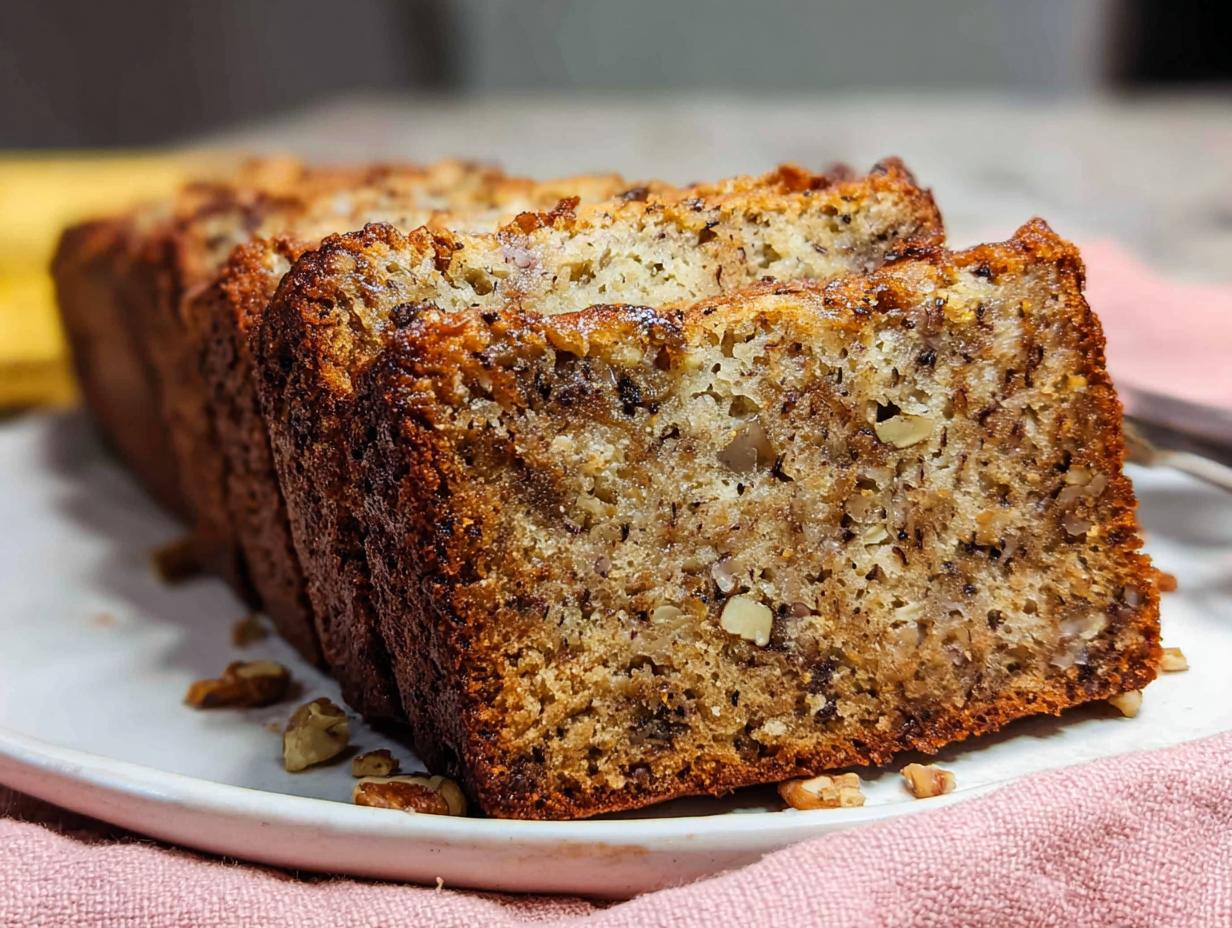
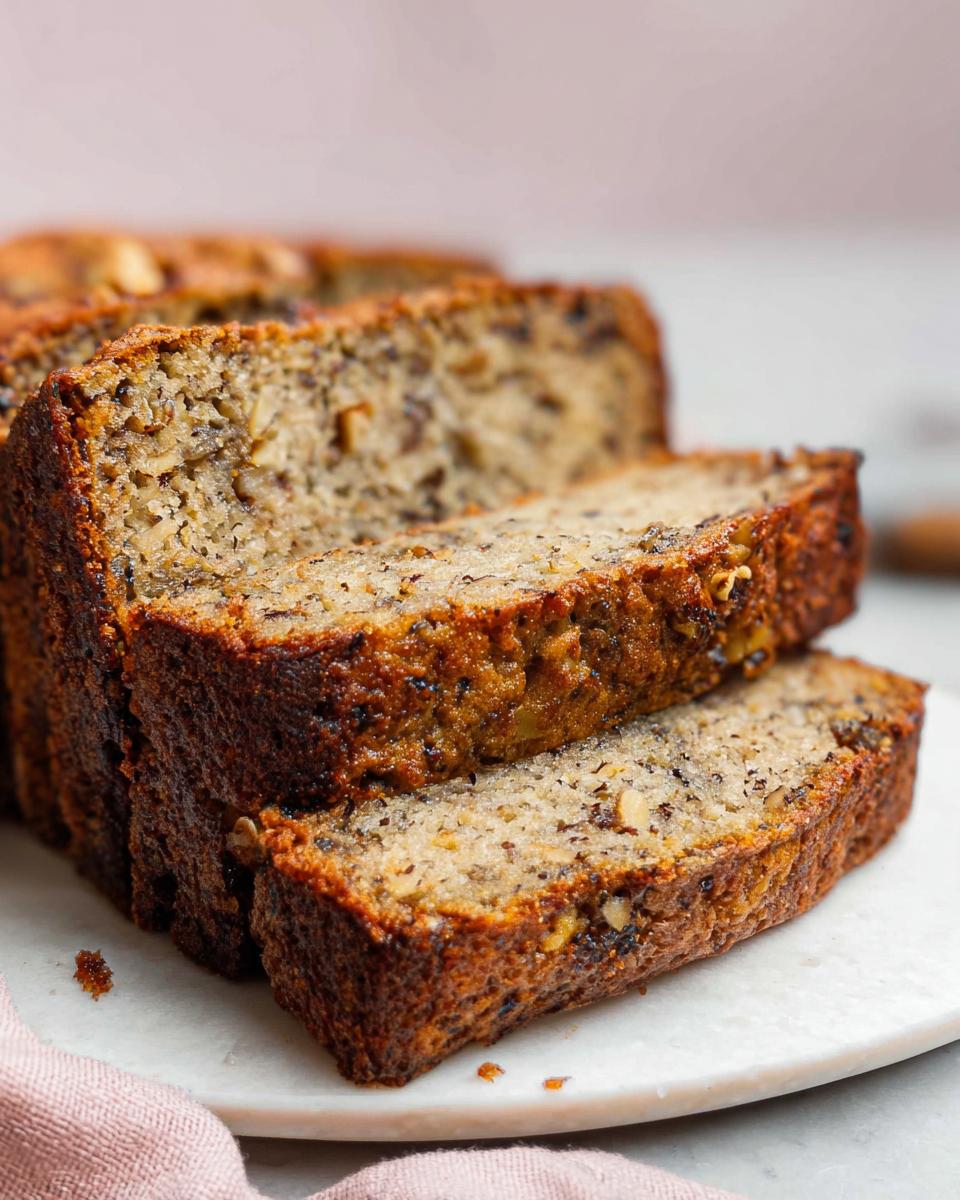
There is simply nothing like that warm, comforting scent drifting through your kitchen when you are baking something truly special. For me, that smell means cozy days and family time, and that’s exactly what this recipe for Banana Nut Bread with Walnuts delivers! If your counter currently features bananas that have gone past their prime—you know, the ones covered in brown spots begging for sweet redemption—then you’ve come to the right place. I still remember the first time my kids and I decided to bake this together on a rainy afternoon. We were stuck inside, and as we mixed the ingredients, I couldn’t help but smile at their laughter and eagerness to help. That sweet aroma filled our home, and soon enough, we had a warm loaf ready to be sliced. It felt like real accomplishment and joy—proof that with a little creativity, we could enjoy our favorite treats!
Why This Banana Nut Bread with Walnuts Recipe Works for Families
This isn’t some complicated cake that needs a whole afternoon—this recipe is designed for real life! It’s fast, it tastes like pure comfort, and it comes together so quickly, making it perfect for those last-minute coffee time treats.
- Quick Prep for Busy Schedules: Honestly, you can get this batter mixed in about 15 minutes. We just mix the dry stuff once, the wet stuff once, then dump them together. No fancy creaming or anything too fussy, trust me!
- Making Banana Nut Bread with Walnuts Gluten-Free Friendly: As a nutritionist, I know how hard balancing taste and diet can be! While I listed standard flour here because it’s traditional, swapping it for any good 1:1 gluten-free blend is super easy. Your family won’t even notice the difference in this moist batch.
Gathering Your Ingredients for Banana Nut Bread with Walnuts
Okay, let’s talk about what you need! Getting the ingredients ready is half the battle, and for two loaves of this amazing banana bread, we aren’t going to need anything too crazy. I always lay everything out on the counter first, just like I’m following an assembly line. It makes mixing so much faster, especially when the kids are waiting impatiently for the banana magic to happen!
Dry Ingredients for the Loaf
- 2 cups all-purpose flour (that’s 240 g)
- 1.5 teaspoons baking soda
- 1 pinch salt
Wet Ingredients and Mix-Ins
This is where the flavor really pops! Don’t skimp on the bananas; they need to be super ripe.
- 1 cup granulated sugar (198 g)
- 0.5 cup vegetable oil (99 g)
- 2 eggs
- 1 teaspoon vanilla extract
- 4 medium ripe bananas, mashed (about 1⅓ cups or 303 grams—use those brown ones!)
- 1 cup coarsely chopped walnuts (113 g)
Step-by-Step Instructions for Perfect Banana Nut Bread with Walnuts
Now for the fun part! Baking this banana nut bread is never a struggle, but you do need to follow the order of operations so we don’t end up with a dense brick. We want airy and moist, remember? This process is so straightforward, even if you just pulled your 8×4-inch loaf pans out of storage. For more easy family favorites, you can always check out my main recipe index.
Prep Work: Oven and Pans
First things first, we need the oven ready to go! Preheat everything to 350 degrees Fahrenheit immediately. While that’s warming up, grab those two loaf pans. You have to grease them well—I use a bit of shortening and flour, really making sure the corners are covered. Set those right aside so they are ready to receive the batter.
Combining Wet and Dry Mixtures
We keep things separate until the very last moment. Whisk your dry ingredients (flour, soda, salt) in one bowl and set it down. In the big bowl, whisk the sugar, oil, eggs, and vanilla, then stir in those mashed bananas until they look happy together. When you finally add the dry mixture to the wet, stir gently! Stop mixing as soon as you don’t see streaks of flour anymore. Overmixing is the enemy here! Then, gently fold in those coarsely chopped walnuts last.
Baking and Cooling the Banana Nut Bread with Walnuts
Pour that lovely batter evenly into your prepared pans. Pop them in the oven for 35 to 45 minutes. Here’s a good trick: if the tops start looking way too dark before your knife comes out clean, just drape a little foil loosely over them. Once they are done, let them rest in the pans for 10 minutes—no more, no less! After the wait, turn them out onto a wire rack to cool down the rest of the way. Check out more tips for mixing bread, like not overdoing it on the wet ingredients, over at this great little spot.
Expert Tips for Your Best Banana Nut Bread with Walnuts
If you want that perfect, moist crumb that makes this Banana Nut Bread with Walnuts so famous, you have to respect the ingredients! I learned these little secrets over years of baking for my family, and they make all the difference between okay banana bread and the best crunchy walnut loaf ever. For even more tips on getting that perfect moistness, check out my guide on the best homemade recipe for moist, fluffy loaves.
The Secret to Moisture: Banana Ripeness
This is non-negotiable, folks. You need the ripest bananas you can find. They should have spots—lots of brown spots! Seriously, if they are just yellow, they aren’t ready. Those dark spots mean high sugar content, which equals incredible sweetness and moisture locked inside the bread. Don’t toss those mushy ones; they are gold for baking!
Walnut Substitutions and Add-Ins
While I love walnuts, you absolutely don’t have to stick to them if you have an allergy or maybe some pecans lying around. Feel free to swap them out for almonds, hazelnuts, or even peanuts if you like! If you want to jazz things up, try folding in a teaspoon of cinnamon—it adds such a cozy flavor—or maybe some chocolate chips for the kids. They disappear fast when you add chips, I promise!
Making Ahead and Storing Your Banana Nut Bread with Walnuts
One of the best things about a good quick bread like this is that it tastes even better the next day! Thank goodness, because we always seem to end up with two full loaves when we bake this recipe, and storing them correctly is key for enjoying them all week long. This recipe is absolutely perfect for getting ahead during the busy season—it’s the ultimate cozy fall baking prep work!
Room Temperature and Reheating
If you plan on eating them within the next few days, just let the loaves cool completely first—that’s important! Once they are totally cool, wrap each loaf tightly in plastic wrap. I usually go a little extra secure, maybe even a double layer of plastic. Stored well, they stay beautifully fresh on the counter for up to five days. We usually don’t have any left by day three!
Freezing for Later
If you know you won’t get to the second loaf right away, go ahead and pop it in the freezer! This locks in all that fresh moisture we worked so hard to achieve. Wrap that loaf first in plastic wrap, just like we did for the counter storage, and then seal that whole package tightly inside aluminum foil. This double barrier keeps freezer burn away. You can easily keep these frozen treats tucked away for up to three months—perfect for pulling out when unexpected guests drop by!
Troubleshooting Common Banana Nut Bread with Walnuts Issues
Every home baker runs into a little hiccup now and then, right? Don’t you worry one bit if your first attempt doesn’t look exactly like the photo! It happens to all of us, even when following a tried-and-true recipe like this Banana Nut Bread with Walnuts. The key is understanding where things went slightly sideways. Getting things right takes a little practice, but these tips should help you feel super confident next time you bake!
My Loaf Baked Unevenly
When we make two loaves, they usually bake up at almost the exact same rate. But if you decided to put all the batter into one big pan—say, you only had one 9-inch loaf pan handy—your baking time is going to shift dramatically. Since the heat has farther to travel to the middle of a thicker loaf, you have to bake it longer. If you check at the standard 35 minutes and your knife is wet, just stick it back in. You might need to check it closer to the 55-minute mark, but be sure to cover it with foil loosely so the top doesn’t burn before the inside is done!
The Bread is Too Dense
Oh, nobody wants a dense loaf when they are hoping for a fluffy, quick bread! The absolute number one reason this happens, even with the right amount of oil and bananas, is over-mixing. Once you dump the dry flour mixture into the wet banana stuff, you need to treat that batter gently. Use gentle strokes with your spatula. Stop mixing the absolute second you see that last puff of flour disappear. If you work it too hard, you’re developing gluten, and we want that loaf soft, not tough!
Estimated Nutrition for Banana Nut Bread with Walnuts
Now, I’m not a registered dietitian here, just a mom who loves to feed her family wholesome food, so please take these numbers with a grain of salt! These figures are just estimates based on the ingredients list for one slice, assuming we divide the two loaves into 16 manageable servings total for a nice snack size. We certainly aren’t baking this for the macros, but it’s good to have a general idea!
- Calories: 219
- Total Fat: 10g
- Protein: 3g
- Carbohydrates: 28g
- Sugar: 14g
Frequently Asked Questions About This Banana Nut Bread with Walnuts
Can I make this banana nut bread without nuts?
Absolutely, you can! If someone in your family isn’t a fan, or if you just ran out of walnuts, don’t stress about it. Nuts are definitely optional in this recipe. If you want to keep the texture interesting, you can replace that missing cup of walnuts with extra mashed banana, or toss in half a cup of chocolate chips or dried fruit instead. It will still be delicious!
What is the best way to serve this crunchy walnut loaf?
Hands down, the best way to serve this is when it’s just slightly warm, maybe about 15 minutes after it comes off the cooling rack. That slight warmth really makes the aroma pop and softens the texture just a tiny bit. A thin smear of softened butter is all you need. It makes the perfect cozy accompaniment for your morning coffee—a fantastic coffee time treat!
How do I convert this recipe to make muffins?
Oh, converting to muffins is a great idea if you’re packing snacks for school or work! The batter works perfectly for muffins. Fill your lined muffin cups about three-quarters full. Because they are smaller, they bake much faster than the loaves—usually just 24 to 28 minutes at the same 350 degrees F. You should get about 18 muffins out of this recipe. If you have any baking questions or need to get in touch, feel free to reach out through my contact page!
Share Your Banana Nut Bread with Walnuts Creations
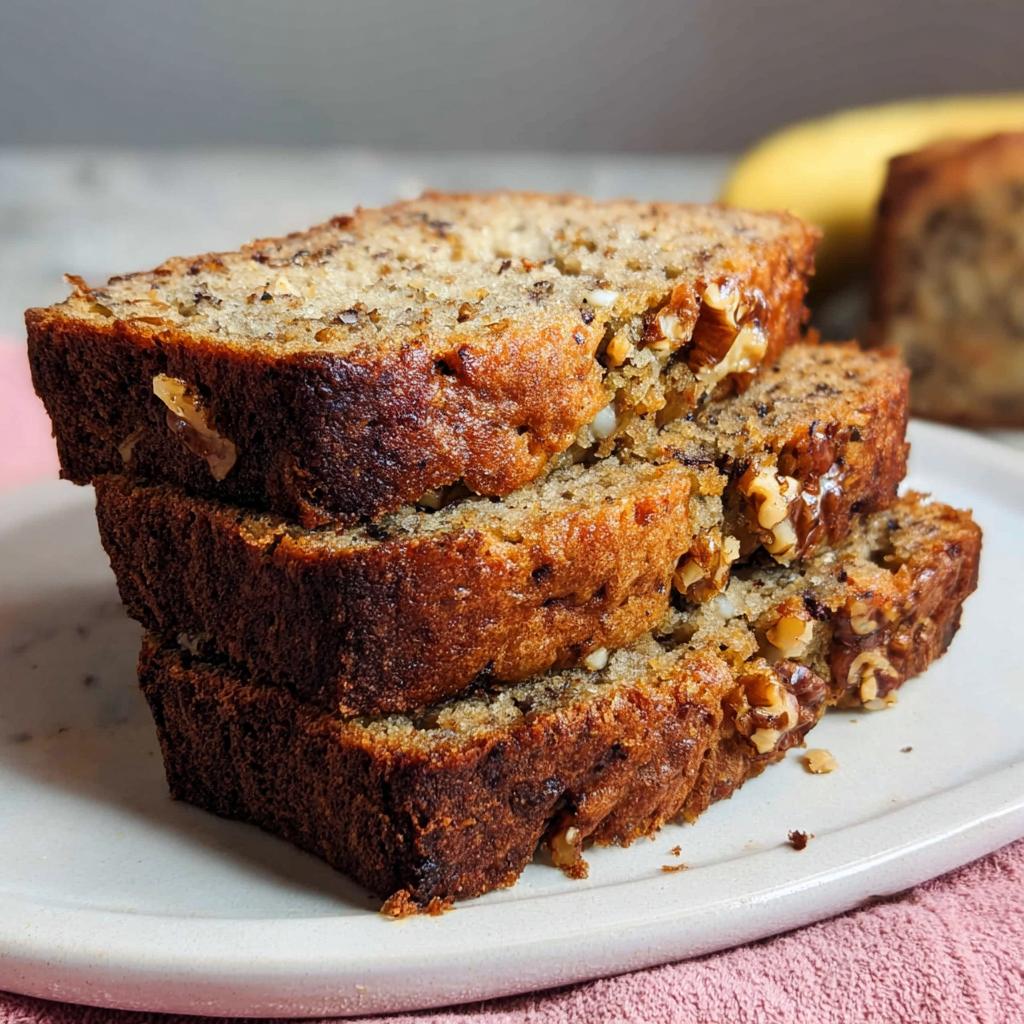
Well, we did it! We took those sad, spotty bananas and turned them into two glorious loaves of Banana Nut Bread with Walnuts. Honestly, seeing your baking success is the best part of sharing these family recipes with you all. It always warms my heart to know that this bread is heading to your tables to be shared during family moments.
I would just absolutely love to see how your loaves turned out! Did you stick to the crunchy walnuts, or did you sneak in some chocolate chips like I sometimes do when the kids aren’t looking? Please leave a quick rating for the recipe down below in the comments section. It helps other busy parents know they can trust this recipe too!
And if you snap a picture while you’re cutting that first warm slice, tag me on social media! Knowing that this little slice of home comfort is traveling from my kitchen to yours makes sharing recipes like this so worthwhile. Happy baking, friends!
Banana Nut Bread with Walnuts
Ingredients
Equipment
Method
- Preheat your oven to 350 degrees F. Grease two 8×4-inch loaf pans and set them aside.
- In a medium bowl, whisk together the flour, baking soda, and salt. Set this mixture aside.
- In a large bowl, whisk together the sugar, oil, eggs, and vanilla extract. Add the mashed bananas and stir gently to combine them with the wet ingredients.
- Add the flour mixture to the wet ingredients and stir until everything is completely blended. Use a rubber spatula to fold in the chopped walnuts.
- Divide the batter evenly into the two prepared loaf pans.
- Bake for 35 to 45 minutes, or until a thin knife inserted into the center of the loaves comes out clean. If the tops start getting too dark before the center is done, cover the pans with foil.
- Allow the loaves to cool in the pans for 10 minutes. Then, turn them out onto a wire rack to cool completely.
- Store the cooled bread tightly wrapped in plastic wrap at room temperature for up to 5 days. To freeze, wrap the bread first in plastic wrap, then in aluminum foil, and freeze for up to 3 months.
Nutrition
Notes
Tried this recipe?
Let us know how it was!
Gluten-Free Nutritionist & Family Meal Planning Expert
Working as a pediatric dietitian at Children’s Hospital of Denver, I kept meeting families overwhelmed by managing their children’s celiac disease. Parents stressed, kids frustrated, everyone eating bland boxed “gluten-free” products.
That’s when I realized my calling: creating practical, balanced gluten-free solutions for real families with busy schedules. I’ve developed 375+ family-friendly recipes focusing on lunch boxes, after-school snacks, and make-ahead dinners that actually work.
My meal planning system was featured in Parents Magazine, and I presented research at the Rocky Mountain Pediatric Nutrition Conference. My evidence-based approach ensures recipes meet both taste and health standards—families need solutions that work in the real world, not just perfect test kitchens.